You’ll find Kitchen King Masala is the kind of blend that lifts everyday curries without stealing the show. Start with warm, toasty cumin and coriander, a soft sweep of turmeric, and a hint of sweet mace; bloom them in hot oil and the aroma will change the whole pot. It’s precise, balanced, and forgiving—there are small tweaks you can make depending on the dish, so keep going to see which ones matter most.
Key Takeaways
- Toast fresh whole spices (cumin, coriander, fennel, cloves, cinnamon, bay leaf, pepper) gently until nutty, then cool completely before grinding.
- Grind toasted spices to a fine, even powder using short pulses or mortar and pestle for best aroma and texture.
- Bloom ½–1 tsp Kitchen King Masala in hot oil or ghee for 30–60 seconds before adding onions or tomatoes to maximize flavor.
- Store the cooled blend airtight in opaque glass, label with date, and use within three months for vivid aroma.
- Adjust regional tweaks: more mace/nutmeg (North), roasted coriander/amchur (Gujarat), smoky chilies (South), poppy/sugar (Bengal).
Why Kitchen King Masala Works in Everyday Cooking
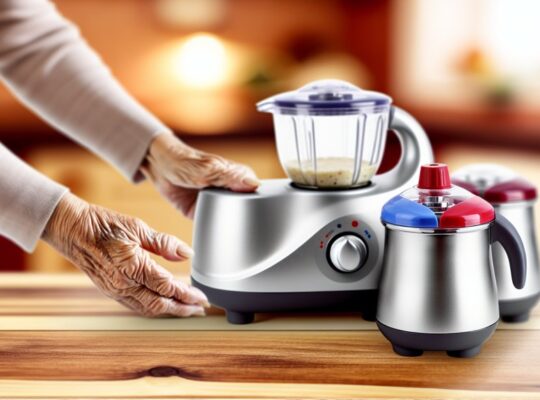
Why does Kitchen King Masala fit into so many home-cooked dishes? You’ll notice its balance immediately: warm cumin and coriander, bright turmeric, and gentle heat from red chili. It layers savory, earthy, and slightly sweet notes so your curry, stir-fry, or roasted vegetables taste rounded without needing complex technique. When you measure carefully and store the blend in an airtight container away from light, the aromas stay vivid and predictable, which matters for consistent results and food safety. As you cook, the spice oils release fragrant steam that signals proper blooming in hot oil or ghee; that step maximizes flavor while reducing raw spice bitterness. You’ll also appreciate how a small pinch can harmonize tomatoes, yogurt, or cream, letting milder ingredients contribute texture and nutrition without masking them. Using Kitchen King Masala responsibly gives reliable, repeatable outcomes that make home cooking both satisfying and safe. Many home cooks find pairing the masala with a compact blender useful for making smooth pastes and marinades quickly.
Whole Spices You’ll Need
You’ll want bright, fragrant whole spices—fresh cardamom pods, cumin seeds, coriander seeds and cloves—to get the clean, lively notes that define Kitchen King. Toast them briefly in a dry pan until they smell nutty and warm, then let them cool so the oils settle. Grind to a fine, even texture so the masala blends smoothly into sauces and rice without gritty bits. For best results, choose and use appropriate equipment (like stainless steel jars and durable blades) that match the hardness of whole spices to ensure even grinding and longer tool life.
Choosing Fresh Whole Spices
How do you tell if whole spices are truly fresh? You’ll press a seed or pod gently: fresh spices yield a crisp snap and release a bright, immediate aroma. Look for vibrant color—cardamom should be green, cumin seeds warm brown, cinnamon sticks tightly rolled without mold or powder. Smell is your safety check; stale spices smell flat or musty. Avoid any with insect holes, damp clumping, or off-odors. Buy from stores with high turnover and sealed containers, and check roast dates when available. At home, store whole spices in airtight, opaque jars away from heat and sunlight to preserve oils and prevent spoilage. When in doubt, replace—fresh whole spices ensure both flavor and food safety. For commercial kitchens, consider sourcing from suppliers who provide high-turnover stock and clear roast dates to ensure consistent quality.
Toasting for Flavor Boost
Having fresh whole spices on hand is only half the battle; to wake up their oils and deepen their aroma you’ll want to toast them briefly before grinding or adding to the pan. Heat a dry skillet over medium; you’ll notice oils blooming and a nutty scent—don’t walk away. Shake the pan or stir with a wooden spoon so nothing scorches. Cool spices on a plate before handling.
- Cumin seeds: toast 1–2 minutes until fragrant and slightly darker.
- Coriander seeds: toast 2–3 minutes until citrusy aroma appears.
- Black peppercorns/cloves: toast 1–2 minutes, watching for quick color change.
Use low to medium heat, keep a timer, and avoid smoking to prevent bitterness and ensure safety. Also, be mindful that residue or worn equipment can affect grinding performance, so check and maintain your tools regularly to prevent excessive vibration and noise.
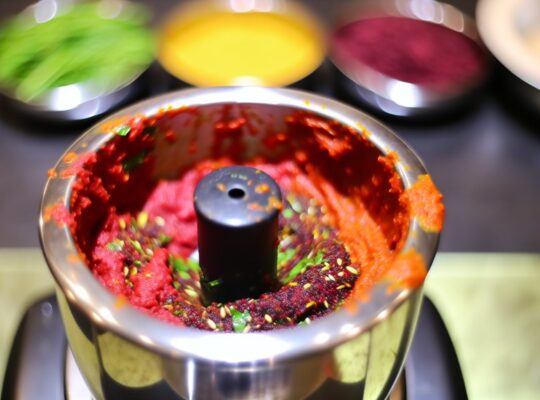
Grinding to Proper Texture
Why grind coarsely or fine—what’s best depends on how the masala will be used? If you’ll finish a curry with the spice, a fine, silky powder releases aromatics quickly and blends smoothly; grind in short pulses, cool between bursts to avoid heating and losing volatile oils. For dry rubs or tempering, a coarse grind gives texture and slow flavor release; crush seeds lightly so pieces stay intact. Use a clean, dry grinder or mortar and pestle, and keep lids secured while running electric grinders. Sift if you need uniformity, then store in an airtight container away from light and heat. Label with date; discard after three months for safety and peak flavor. For consistent results when using an electric grinder, choose a model with a robust 750W motor and good ventilation to prevent overheating.
Optional Ingredients and Substitutions
Looking to tweak the flavor or adapt to what’s in your pantry? You can safely swap or add a few things without upsetting balance. Keep measurements modest so you can taste and adjust.
- Cardamom pods — bruise and add 2–3 for floral lift; if you don’t have pods, 1/4 tsp ground is fine.
- Dry mango powder (amchur) — 1/2 tsp adds bright, tangy acidity; lemon juice is harsher, so use sparingly.
- Fennel seeds — 1/2 tsp gives a sweet, anise note; substitute with a pinch of ground fennel if needed.
Use fresh, dry spices—check smell to ensure potency and discard any that smell stale. If you’re sensitive to heat, reduce chili amount incrementally and taste. Store the finished blend in an airtight container, kept cool and away from light to preserve aroma and safety. Label with date and use within three months for best flavor. Consider using a 450-watt motor mixer grinder for light grinding tasks to protect spice oils and avoid overheating.
Roasting Techniques for Maximum Aroma
Start by dry-roasting whole spices in a heavy pan so their oils bloom and the aroma becomes bright and nutty. Keep the heat gentle and steady; low warmth coaxed with occasional shaking prevents burning and preserves delicate notes. Let the spices cool completely before grinding so the steam doesn’t mute the fragrance and you get a clean, potent powder. Usha mixer grinders often use 100% copper motors which help deliver smooth, fine grinding for spice blends.
Dry-Roast Whole Spices
Want your spices to sing? You’ll dry-roast whole spices to unlock bright, layered aroma without burning their oils. Use a sturdy, dry skillet and keep spices moving; you want even, controlled browning and no smoke.
- Heat and watch: warm the pan over medium, add spices, and keep them in motion to prevent scorching.
- Test and cool: when seeds pop or give off a nutty scent, remove to a cool plate immediately to stop cooking.
- Grind promptly: once cool, grind in small batches for maximum fragrance; don’t overcrowd the mill.
Always use a well-ventilated space, an oven mitt if needed, and avoid high flames; safety preserves aroma and flavor. Let the pan and spices rest between batches to prevent overheating and preserve the spice oils cooling intervals.
Gentle Low Heat
Gentle heat is your secret for coaxing deep, mellow aroma from spices without scorching their oils—keep the flame low, the pan warm, and patience close at hand. Hold the pan over a low gas or electric setting so spices warm evenly; you’ll smell a rising, nutty perfume after a few minutes. Keep the pan moving with a flat spatula or by gently shaking to prevent hot spots. If you see smoke or a sudden darkening, remove the pan immediately and cool briefly before continuing—burnt notes are irreversible. Use a dry, heavy-bottomed skillet for steady heat and small batches so each seed or pod has contact with the pan. Stay attentive; gentle roasting rewards you with balanced, safe aroma. For frequent batch roasting in busy kitchens, consider equipment rated for continuous duty to avoid overheating and ensure consistent results.
Cooling Before Grinding
After you take the toasted spices off the heat, let them cool completely on a wide, single layer so they settle and stop cooking—warm seeds will keep releasing steam and can turn past their peak flavor if you grind too soon. You’ll feel the temperature drop and smell the oils mellow; cooling preserves bright top notes and prevents clumping in the grinder. Handle with care—hot pans and steam can burn.
- Spread: use a metal or ceramic tray so heat dissipates evenly.
- Space: give each seed room; crowding traps heat and moisture.
- Test: touch a few seeds; they should feel room temperature and dry before grinding.
Once cool, grind in short pulses to avoid heat buildup and store promptly in an airtight container.
Grinding Methods: Mortar & Pestle vs. Grinder
Which method gives you the truest aroma—hand-crushed in a mortar and pestle or blitzed in a grinder? You’ll notice immediate differences. With a mortar and pestle you crush whole toasted spices slowly; the friction releases essential oils in stages, so cardamom, cinnamon and cloves bloom with bright, layered scents. You control texture precisely—coarse bits for rustic warmth or fine powder for even seasoning. It’s tactile and quiet, but requires effort and clean, dry tools.
A grinder is fast and consistent; short pulses keep heat buildup low and protect volatile oils, but prolonged runs will warm spices and dull aroma. Use small batches, pulse rather than run continuously, and pause to let the blade and spices cool. Whether you pick the mortar for nuance or the grinder for speed, keep surfaces dry, clean, and cool to prevent clumping and microbial growth—safety and aroma go hand in hand. Modern grinders with acoustic damping and proper duty cycles can help preserve aroma while reducing noise and wear.
Step-by-Step Homemade Kitchen King Masala Recipe
You’ll start by choosing fresh whole spices—coriander, cumin, fennel, peppercorns, cloves, cinnamon, and bay leaves—so their aromas are bright and distinct. Next you’ll roast them until they smell toasty and slightly nutty, then grind to a fine, warm-hued powder that releases an immediate burst of fragrance. Finally, you’ll store the masala airtight in a cool, dark place and use it sparingly to lift curries, vegetables, and marinades.
Whole Spice Selection
How do you choose whole spices that’ll give your Kitchen King Masala deep, balanced aroma? You’ll look, smell, and feel each spice: glossy cardamom pods, firm cinnamon sticks, plump coriander seeds. Pick spices that’re dry, unblemished, and fragrant — they’ll be safer and more flavorful.
- Examine: inspect for mold, insect damage, or dampness; reject anything off-smell.
- Smell: crush a seed gently; fresh spices give a bright, immediate aroma—avoid stale, flat scents.
- Measure: choose proportions by weight for consistency; keep records so you can reproduce a safe blend.
Store whole spices airtight, cool, and dark. Label with date. That keeps aroma intact and reduces risk of spoilage before you roast and grind.
Roast and Grind
Ready to transform those whole spices into a fragrant, balanced Kitchen King Masala? You’ll roast each spice dry in a heavy skillet over medium-low heat, shaking constantly so cardamom, cloves, cumin, coriander, fennel, and bay leaves toast evenly. Watch for color deepening and a nutty aroma; don’t let them smoke. When seeds begin to pop and oils bloom — typically 3–6 minutes — transfer immediately to a cool plate to stop cooking. Let them cool fully; warm spices can steam in the grinder and lose crispness. Grind in short pulses in a clean, dry spice grinder to a fine powder, pausing to scrape sides so nothing clumps. Sift once for uniform texture, and handle with dry, clean utensils to preserve aroma and safety.
Storage and Usage
Wondering how to keep your Kitchen King Masala at peak flavor and where to use it first? Store it airtight in a cool, dark place—glass jars with tight lids work best—to preserve the bright aroma and warm, peppery bite. Let it cool fully before sealing to prevent condensation. Label with date; homemade blends are freshest within 3 months.
- Roast-safe storage: choose opaque jars, keep away from heat and sunlight.
- Daily use: sprinkle into curries and daals at mid-cook for layered fragrance.
- Finishing touch: add a pinch off-heat to salads or yogurt to wake aromas.
Always use clean, dry spoons to avoid contamination; if off-smelling or clumpy, discard.
Flavor Tweaks for Regional Variations
Spices shift subtly across India, and small tweaks to your Kitchen King Masala can make it sing like a specific region—add a pinch more mace and nutmeg for a North Indian warmth, boost roasted coriander and dried mango powder (amchur) for a tangy Gujarati edge, or introduce smoky dried red chili and a touch of roasted cumin for a South Indian roastiness. You’ll want to adjust in small increments, tasting as you go, and label each batch clearly for safety.
| Region | Key tweak |
|---|---|
| North | Increase mace, nutmeg |
| Gujarat | More roasted coriander, amchur |
| South | Smoked red chili, roasted cumin |
| Bengal | Add white poppy seed, a hint of sugar |
| Maharashtra | Toasted sesame, kokum (small amount) |
Measure with spoons, not by eye, and keep records of amounts you liked. Smell each trial and note harmony, heat, sweetness and tang. Store separately to avoid cross-contamination of flavors.
How to Use Kitchen King in Curries and Gravies
Those regional tweaks you just tried will show up beautifully once the masala meets fat and simmering liquid — that’s where Kitchen King really unfolds. You’ll want to bloom it in oil or ghee for 30–60 seconds until it smells warm and slightly nutty; this releases volatile oils safely without burning. Add onions, tomatoes, or coconut milk next so the spice disperses into the sauce as it simmers. Adjust salt and acid at the end to keep flavors balanced.
- Bloom early: heat fat, sprinkle masala, stir until fragrant.
- Integrate with liquid: add stock or coconut milk, simmer gently for 10–20 minutes.
- Finish safely: taste, then add acid (lemon/vinegar) and fresh herbs off-heat.
You’ll notice a rounded, savory aroma and smoother mouthfeel when you follow this sequence. Keep heat moderate, stir to prevent scorching, and cook long enough for flavors to marry without overreducing the gravy.
Storing Your Homemade Masala for Freshness
Storing your Kitchen King masala properly will keep its aroma bright and its flavor balanced — you’ll want to protect it from heat, light, moisture, and strong odors. After grinding, let the blend cool completely to room temperature; warm spice traps steam and speeds spoilage. Transfer to an airtight glass jar with a tight lid — glass won’t absorb oils or odors the way plastic can. Store the jar in a cool, dark cupboard away from the stove and any sunlight; aim for a consistent temperature below 25°C (77°F).
Label the jar with the date and use within three months for peak potency; whole spices keep longer, so consider storing fractions separately. Avoid wet spoons and don’t sniff directly into the jar if your hands are damp. If you spot clumping, off smells, or a dull color, discard the batch—safety matters more than saving a few teaspoons. Small, sealed containers let you preserve freshness while minimizing waste.
Quick Ideas for Leftover Spice Blend
Once you’ve stashed your jar away, don’t let leftover Kitchen King masala sit unused — it’s bursting with aromatic potential. You can reach for a pinch to freshen dishes, but treat it like a potent ingredient: measure cautiously, store tightly, and check for off-odors before use.
- Marinated veg: Mix 1–2 tsp masala with yogurt, lemon, and oil; coat vegetables and roast until edges caramelize — the blend perfumes and crisps safely at high heat.
- Toasted rice boost: Stir a small spoon into hot ghee before adding rice; the spices bloom instantly, giving each grain a warm, nutty scent without overpowering.
- Quick soup stir-in: Add ½–1 tsp to simmering broth with a squeeze of lime; it adds depth and a controlled spice note while you keep simmering to neutralize raw sharpness.
Always label jars with date, keep them cool and dry, and discard if aroma or color fades.
Frequently Asked Questions
Can Kitchen King Masala Be Used in Marinades for Grilling?
Yes — you can use Kitchen King Masala in grilling marinades. It’ll add warm, complex aroma and savory depth; just balance salt, acid, and oil, marinate refrigerated, and cook thoroughly for safe, flavorful results.
Is Kitchen King Suitable for People With Nut Allergies?
No — you shouldn’t assume it’s safe; many blends can contain nuts or be cross‑contaminated. Smell and inspect the label, choose certified nut‑free brands, or contact the manufacturer to confirm before you use it.
Can I Freeze the Masala for Longer Storage?
Yes — you can freeze the masala to extend storage; pack it airtight, remove as much air as possible, label with date, and thaw in the fridge. It’ll keep flavor reasonably well for about 6 months.
Does Kitchen King Pair Well With Non-Indian Cuisines?
Yes — it complements non-Indian dishes. You’ll notice warm, aromatic notes enhancing roasted vegetables, grilled meats, soups; start with small amounts, taste as you go, and adjust to assure safe, balanced, familiar flavors for everyone.
How Long Does Homemade Masala Retain Peak Flavor?
Homemade masala stays at peak flavor about 1–3 months if stored airtight, cool, dark, and dry; you’ll notice bright aromas fading after three months, so grind small batches and tuck jars away from heat and light.