You can make your mixer grinder last far longer with a few steady habits that protect the motor, blades, and seals. Unplug before cleaning, dry jars completely, avoid overfilling, and use short pulses at the right speed to reduce strain. Check blades and gaskets monthly for wear and keep ventilation clear. Follow these practical steps and you’ll prevent common failures—and there are a few more low-effort tricks that really help.
Key Takeaways
- Clean and dry jars, blades, and lids immediately after use to prevent corrosion and contamination.
- Avoid overfilling; operate jars two-thirds full and process dense items in small batches.
- Use short pulses and appropriate speeds; let the motor cool between extended runs.
- Inspect blades, gaskets, cords, and vents regularly; replace worn or damaged parts promptly.
- Keep motor housing vents clear, unplug before maintenance, and never immerse the base in water.
Regular Cleaning and Drying Routine
Regularly cleaning and thoroughly drying your mixer grinder keeps it working efficiently and prevents odors, rust, and motor strain. You should unplug the unit before disassembling jars, blades, and lids. Rinse jars immediately after use to avoid residue hardening; use a soft brush for crevices and avoid abrasive pads that can nick surfaces. Remove and wipe the blade assembly carefully—handle by the shaft, not the edges—to prevent cuts. Wipe the base with a damp cloth; never immerse the motor housing. Check and clean the air vents with a dry brush or compressed air to prevent overheating. After washing, dry jars and blades completely with a lint-free towel, then air-dry upside down to clear trapped moisture. Reassemble only when all parts are bone dry to avoid electrical faults and rust. Store lids off or loosely to allow airflow. Perform this routine after each heavy use and inspect seals regularly for wear to maintain safe, reliable operation. For heavier or more frequent use, consider choosing a 750W motor which offers better torque and cooling for longer motor life.
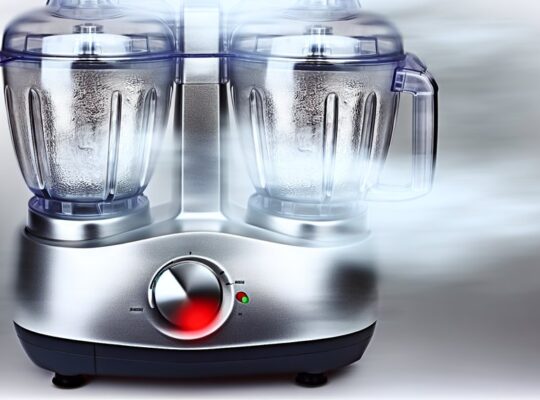
Proper Loading and Jar Selection
Choose the jar that fits the job—use the small jar for chutneys and the large one for batter or wet grinding so the motor isn’t strained. Don’t overfill: leave the recommended headspace (usually 1/3 to 1/2) so ingredients can circulate without jamming the blades. Proper loading and the right jar reduce wear, prevent overheating, and give you consistent results. Inspect gaskets and lids regularly and replace any that are damaged to maintain a proper seal and prevent leaks during use (gasket checks).
Match Jar Size to Task
How much are you putting in the jar? Choose the smallest jar that comfortably holds the ingredients for the job. A correctly sized jar keeps contents centered, reducing strain on the motor and blades. For small chutneys, spices or wet pastes, use the chutney/small jar; for smoothies or batters, use the medium jar; reserve the large jar for dough or bulk chopping. Ensure the blade assembly sits submerged just enough for efficient cutting — not so little that air pockets form, not so much that splashing occurs. Matching jar size minimizes run time and prevents frequent idling or overwork. Always secure lids and check seals; a well-matched jar improves safety and extends your mixer’s lifespan. Stainless steel jars are durable and corrosion-resistant, making them a good choice for longevity.
Avoid Overfilling Jars
Ever wondered why your grinder stalls or splutters mid‑blend? Overfilling jars strains the motor, causes poor circulation, and increases spill risk. You should fill jars only to the recommended level — usually marked or about two‑thirds full — so blades have room to move and ingredients can tumble.
- Check markings: follow max‑fill lines or manual guidance to prevent motor overload and overheating.
- Portion correctly: process in batches for dense or bulky items; smaller loads mean cleaner cuts and less wear.
- Secure lids & seating: ensure lids click and jars sit flush before starting to avoid leaks or sudden stops that can damage gears.
Stick to these steps to protect the motor and keep operation safe and predictable. The Zodiac’s fiber‑reinforced body and wider base can help reduce vibration during use and prolong motor life, especially when processing heavier batches like batter or masalas, so consider models with fiber‑reinforced body for added durability.
Correct Use of Speed and Pulse Functions
Use the right speed for the job — low for wet blending, medium for purees, and high only for fine grinding. Rely on short pulse bursts to control texture and prevent overheating. Don’t run high speed continuously; it strains the motor and shortens the grinder’s life. Choose a grinder with good overload protection to help prevent motor damage when you push the machine too hard.
Match Speed to Task
When should you crank the speed up or tap the pulse button? Match speed to the ingredient and volume to reduce motor strain and improve safety. Start slow for liquids and soft items, increase gradually for tougher material, and use pulse only when you need controlled short bursts (not continuous high power). Read your manual for recommended settings.
- Soft or hot liquids: low speed to prevent splashing and overheating; stir occasionally and avoid overfilling.
- Hard or fibrous items: medium-to-high speed in small batches; let the motor rest between runs to prevent burnout.
- Grinding dry spices or coarse grains: use steady medium speed, secure the lid, and monitor temperature to avoid motor overload.
Always unplug before adjusting attachments. Consider selecting a commercial-grade motor with thermal overload protection to safeguard the motor during heavy or continuous use.
Use Short Pulse Bursts
Why tap the pulse instead of running full speed? You control texture, prevent overheating, and reduce motor strain by using short pulse bursts. Tap for 1–2 seconds, pause, then repeat; that keeps blades from binding and stops ingredients from packing. Check the jar and blade fit before pulsing. Use pulses for coarse chop, ice crush, or to incorporate without overworking.
| Task | Pulse Length | Result |
|---|---|---|
| Coarse chop | 1s x 5 | Even pieces |
| Ice crush | 2s x 3 | Controlled shards |
| Nut grind | 1s x 6 | Avoids paste |
| Blend start | 1s then steady | Prevents load spike |
Always unplug before adjusting blades. Let the motor cool if it feels hot; safety extends appliance life. Also, inspect blades and seals regularly for damage and proper seating to avoid vibration and motor strain blade seating.
Avoid Prolonged High-Speed
How long do you really need it on full blast? You shouldn’t run the grinder at top speed for long — heat and vibration wear brushes, bearings, and seals. Use high speed sparingly for short, precise tasks and switch to lower speeds for tougher loads. Let the motor rest between heavy cycles to cool.
- Use pulse for 1–3 second bursts when chopping; avoid continuous high RPMs that create heat.
- For wet grinding, start slow to emulsify, then increase briefly; stop every 30–45 seconds to check temperature and texture.
- If you smell burning or see smoke, stop immediately, unplug, let it cool, and inspect for obstructions or worn parts.
Doing this protects the motor and keeps operation safe. Choose a grinder with overload protection to further safeguard the motor during heavy or prolonged use.
Blade Inspection and Sharpening
Curious whether your mixer grinder’s performance drop is just a dull blade? Inspect blades every 1–2 months: unplug the unit, remove the jar, and lock the blades out before handling. Look for nicks, rounded edges, bends, or corrosion; tiny chips will reduce efficiency and stress the motor. Check the blade assembly hub and seal for wear or leakage—replace seals to prevent wobble. If blades are only slightly dull, sharpen them carefully: secure the blade in a vise with padding, use a fine-toothed file or bench grinder at low speed, and maintain the original bevel angle. File in one direction, applying light, even passes; avoid overheating the metal. After sharpening, balance the blade by sight and feel; any wobble means you should replace it. Reassemble with a new gasket if needed, tighten fittings to spec, and run a short test with water. Always follow manufacturer guidelines and wear cut-resistant gloves and eye protection when inspecting or sharpening. Also, always unplug the grinder and ensure the base is dry and stable before starting any inspection or maintenance to reduce electrical and slipping hazards, and confirm the socket is grounded properly.
Motor Care and Ventilation Tips
Want your grinder’s motor to run cooler and last longer? Keep airflow clear, balance loads, and use it within rated duty cycles. Blocked vents trap heat and strain windings, so unplug the unit and blow compressed air through intake and exhaust every month, or vacuum gently to remove dust. Avoid grinding heavy or wet batches that force the motor to stall; instead pulse briefly and let the motor rest between cycles. If you notice unusual smells, smoke, or persistent humming, stop immediately and have a qualified technician inspect the motor.
- Check vents weekly: ensure 1–2 cm clearance around the appliance and wipe away lint or grease buildup.
- Manage workload: use short pulses, don’t overload jars, and let the motor cool for 10–15 minutes after prolonged use.
- Monitor performance: record changes in sound, speed, or heat; early detection prevents catastrophic motor failure.
Also, perform regular maintenance checks on seals, blades, and power cords to ensure safe operation and prevent damage to the motor from leaking or worn components, especially checking seals and gaskets for wear.
Seals, Gaskets, and Lid Maintenance
Why check the seals and lids regularly? You’ll prevent leaks, avoid contamination, and reduce strain on the motor. Inspect rubber gaskets and lid rims before each use: look for cracks, hardening, compression set, or missing pieces. Replace any gasket that’s brittle, swollen, or fails to seat snugly; a poor seal lets liquids reach bearings and switches.
Clean seals and lid grooves after every batch. Use a soft brush and mild soap, rinse thoroughly, and dry completely to prevent mold. Don’t use harsh solvents or abrasive tools that can deform rubber. When reassembling, align lids and clips precisely; a misaligned lid can pop off under pressure.
Store spare gaskets in a cool, dark place to avoid UV and heat damage. If you notice persistent odors, discoloration, or repeated leaks despite correct seating, replace the part—continued use risks equipment damage and food safety. Regular, small checks keep the grinder safer and lasting longer.
Safe Electrical Practices and Wiring Checks
How often do you check the cord and plug before you use the grinder? Inspect visually each time: look for cuts, fraying, exposed wires, discoloration or stiff spots. Don’t use the grinder if the cord’s damaged — unplug and isolate it until repaired by a qualified technician. Verify the plug fits snugly in the outlet and that pins aren’t bent or blackened. Check that the switch moves smoothly and the housing shows no cracking near entry points.
- Test the outlet with another small appliance to confirm proper contact and no sparking.
- Ensure the grinder is connected to a grounded (three-pin) socket or a correctly wired adapter; never defeat grounding.
- Use short, untangled cords; avoid extension cords for heavy loads and never run cords under rugs.
Always unplug before cleaning or inspecting internal areas, and keep the cord away from hot surfaces and water to reduce shock and fire risks.
When to Repair or Replace Parts
After you’ve ruled out wiring problems, inspect individual parts to decide whether to repair or replace them. Start with visible wear: cracked jars, warped lids, stripped threads and brittle seals are replacement items—don’t tape or jury‑rig these. Check blades for nicks or imbalance; small dulling can be sharpened safely, but bent or chipped blades must be replaced to avoid vibration and motor strain. Examine bearings and bushings for play or grinding noise; if they’re accessible and you have the right tools, replace them rather than risk motor damage. Smell or smoke indicates overheating — stop, let it cool, and have a qualified technician inspect the motor and capacitor. Switches and couplers that slip intermittently can sometimes be cleaned; if contact surfaces are pitted replace the component. Keep manufacturer part numbers and service manual notes; always use genuine or equivalent parts, and prioritize safety over saving a marginal cost.
Frequently Asked Questions
Can I Grind Ice or Frozen Ingredients Safely?
You shouldn’t grind hard ice or large frozen blocks; you can crush small ice chips or partially thawed frozen fruit in short bursts, using the pulse function, sturdy blades, and safety guards to avoid motor strain and blade damage.
Are Plastic Jars Dishwasher-Safe?
Usually no — most plastic jars aren’t dishwasher-safe. You’ll risk warping, cracking, or leaching chemicals from heat. Check manufacturer labels: if marked top-rack dishwasher-safe, use that; otherwise wash gently by hand with mild detergent.
Will Acidic Foods Corrode the Jar or Blades?
Yes — acidic foods can corrode blades and degrade jar seals over time. You should rinse promptly, avoid prolonged storage, use stainless blades, dry components thoroughly, and check seals regularly to prevent acid-induced damage and ensure safe operation.
Can I Use the Grinder for Non-Food Items?
No — you shouldn’t use the grinder for non-food items. Doing so risks motor damage, blade dulling, contamination, and safety hazards. Stick to food use only; check the manual if you absolutely must process approved non-food materials.
How Long Is a Typical Manufacturer Warranty?
Typical warranties are 1–2 years for parts and labor, sometimes longer for motors; you’ll see variations by brand and model. Check the fine print for exclusions, registration requirements, and extended warranty purchase options.