Before you start, unplug the grinder and set it on a stable, well-lit surface away from sinks. You’ll wear cut-resistant gloves and eye protection, then remove jars, lids, and blades in a set order. You’ll clean and inspect each part, pay special attention to vents and the coupling, and tackle mineral buildup and odors with safe solutions. Follow drying and reassembly steps carefully — there’s one critical check you shouldn’t skip.
Key Takeaways
- Unplug the unit, wear gloves and eye protection, and move it to a stable, well-lit surface before starting.
- Disassemble jars, lids, blades, gaskets, and retainers; organize parts on a towel for cleaning and inspection.
- Soak removable parts in warm soapy water, scrub crevices with a soft brush, rinse with hot water, and air dry completely.
- Clean motor housing and vents with a soft brush or low-pressure compressed air, wipe with a damp cloth, and ensure vents are fully dry.
- Reassemble only when all parts are dry, inspect seals and blades for wear, test briefly unplugged for leaks, then reconnect power.
Safety First: Unplugging and Preparing the Workspace
Why start here? You’ll prevent accidents and ensure the job goes smoothly. First, unplug the mixer grinder and confirm the power indicator is off; don’t rely on the switch alone. Move the unit to a stable, well-lit work surface clear of water sources and flammable materials. Place a soft towel or rubber mat to stop slipping and cushion parts. Gather basic PPE: cut-resistant gloves and safety glasses, and keep a first-aid kit nearby. Have containers ready for small components and a labeled tray for screws to avoid mix-ups. Ensure good ventilation if you’ll use cleaners or degreasers. Keep children and pets out of the area and post a short note if others share the space so they won’t plug the unit in accidentally. Finally, consult the manufacturer’s manual for model-specific warnings before you touch any part, and proceed only when you’re confident the unit is electrically isolated and the workspace is controlled. Many small households find that a 500 watt mixer grinder is perfectly suited to everyday tasks and easier to handle during deep cleaning.
What to Remove: Disassembling Jars, Lids, and Blades
Start by removing the jars and their lids from the motor base, setting each piece on a clean towel. Unscrew or unlock the blade assemblies and lift them out carefully, then separate any rubber gaskets and plastic caps for individual inspection. Keep parts organized so you can clean, dry, and reassemble them in the correct order. Before you begin, always unplug the mixer and wear cut-resistant gloves and eye protection.
Remove Jars and Lids
Before you clean, you’ll need to disassemble each jar, lid, and blade so you can access hidden food residue and inspect seals and fasteners. Begin by unplugging the unit and removing jars from the motor base. Lift lids straight off to avoid spilling contents; set them on a clean towel. If lids have removable inner caps or seals, pry them out gently with a soft tool—don’t force plastic parts. Tip jars to check rims and gasket grooves for trapped debris. Inspect threads and locking tabs; note worn or cracked seals for replacement. Rinse jars and lids under warm running water to remove loose particles before soaking. Place small parts in a mesh basket so nothing goes missing and you keep work safe and orderly. For heavily used or older units, also check blade edges and mounting points for wear and sharpness to ensure safe reassembly and optimal performance (blade maintenance).
Detach Blade Assemblies
How do you safely remove blade assemblies without risking cuts or damage? You’ll work deliberately: unplug the unit and place jars on a stable surface. Hold the jar base with a thick dish towel or wear cut-resistant gloves to protect your hands. Turn the blade assembly counterclockwise—apply steady pressure rather than jerking—to loosen it from the jar. If it’s stuck, soak the threaded area in warm, soapy water for 10–15 minutes before trying again. Once loose, lift the blade straight up and away from the jar to avoid contact with the sharp edges. Inspect the blade for nicks, rust, or loosened rivets; note any damage for repair or replacement. Set blades on a towel with cutting edges facing down. Always unplug the unit before assembling, disassembling, cleaning, or touching blades to reduce the risk of electric shock and accidental start-up, and review pre-use checks to ensure the appliance is safe to handle.
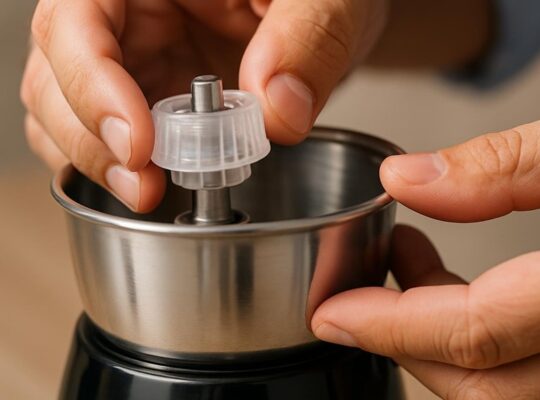
Separate Gasket and Caps
With the blades removed and set aside, you’ll next separate the rubber gasket and caps so every sealing surface can be cleaned and inspected. Work methodically: lift jar from base, invert and locate retaining nut or clip, then pry caps gently with a non‑metallic tool to avoid nicking surfaces. Peel the rubber gasket off the cap, noting orientation for reassembly. Rinse each piece under warm water to remove debris, then soak short‑term in soapy water; avoid boiling unless manufacturer allows. Inspect gaskets for cracks, compression set, or embedded food; replace any compromised parts. Dry components thoroughly on a clean towel to prevent mold. When reassembling, seat gaskets evenly and hand‑tighten caps to ensure a safe, leak‑free seal before testing. Note that models with fiber-reinforced body may still require careful gasket inspection despite their durable construction.
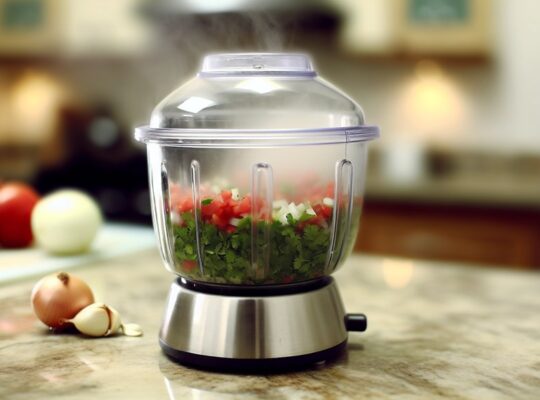
Routine Wash: Cleaning Jars, Lids, and Accessories
Want a quick, reliable routine wash that keeps jars, lids, and accessories hygienic and functioning? Start by unplugging the unit and removing all detachable parts. Rinse jars and lids under warm running water to remove loose debris. Prepare a solution of mild dish soap and warm water; avoid abrasive cleaners or harsh chemicals that can damage seals or plastic. Use a soft brush or sponge to clean interior surfaces, paying attention to corners, spouts, and thread grooves where food can hide. For lids and smaller accessories, use a toothbrush to reach crevices; for removable gaskets, lift and wash separately to ensure seals dry thoroughly. Rinse everything with hot water to remove soap residue. Air dry on a clean rack or towel; never reassemble parts that are still damp, as moisture promotes bacterial growth. Inspect for wear or residue before reattaching. Store components dry and assembled only when completely clean and dry. For longer motor life and safer operation, also ensure proper earthing practices and stable voltage when using higher-wattage appliances.
Deep Clean Blades and Couplings Without Damage
After you’ve cleaned jars, lids, and accessories, focus on the blades and couplings—these parts handle the toughest residues and need careful attention to avoid dulling or misalignment. First, unplug the unit and remove blade assemblies per the manual. Use a stiff nylon brush and a drop of dish soap to dislodge stuck particles; avoid metal pads that can nick edges. Rinse under warm running water, angling to wash debris away from the blade pivot. For dried residues, soak blades briefly in warm soapy water—no more than 10 minutes—to prevent loss of temper. Inspect the coupling for wear, cracks, or loosened splines; replace any compromised piece to maintain alignment. Dry blades and coupling thoroughly with a lint-free cloth, and let parts air-dry completely before reassembly to prevent corrosion. Refit components following torque or seating instructions in the manual. Test operation briefly with no load to confirm smooth engagement and safe function. Consider replacing worn stainless steel components or couplings to ensure long-term durability and alignment.
Motor Housing: Wiping, Dusting, and Ventilation Care
Start by unplugging the grinder and wiping the motor housing with a damp microfiber cloth to remove grease and grime without letting moisture enter seams. Use a soft brush or compressed air on the air vents to dislodge dust, working from the outside in so debris doesn’t get pushed deeper. Check vents for obstructions and restore airflow before reassembling and testing the unit. Ensure good ventilation around the appliance to prevent heat buildup and reduce the risk of motor overheating.
Wiping Exterior Surfaces
How often you clean the motor housing depends on use, but regular wiping and dusting will keep performance consistent and prevent overheating. Begin by unplugging the unit and allowing it to cool. Use a soft, lint-free cloth slightly dampened with mild detergent solution; never spray liquid directly onto the housing. Wipe in straight strokes, removing spills, grease, and food particles. Follow with a dry cloth to prevent moisture ingress. For crevices, use a soft brush or cotton swab to dislodge debris, then vacuum gently with a soft-brush attachment. Inspect rubber feet and external seals, wiping them clean and checking for damage. Reassemble any removed parts only after complete drying. Store the grinder in a dry, dust-free area to maintain safety and longevity. Regularly check the motor’s ventilation and cooling system to ensure proper airflow and prevent overheating, especially if your grinder has a 500W motor.
Cleaning Air Vents
Why should you pay careful attention to air vents? Because clogged vents cause overheating, reduce motor life, and create fire risk. Before cleaning, unplug the grinder and wait for the motor to cool. Use a soft brush or compressed air at low pressure to dislodge dust from vent slots—keep the nozzle at least 6–8 inches away to avoid moisture buildup or rotor damage. Hold the unit steady and blow in short bursts, rotating the housing so all vents are cleared. Wipe accessible surfaces with a dry microfiber cloth; if sticky residue remains, use a cloth slightly dampened with isopropyl alcohol and dry immediately. Inspect vents for cracks or loose fittings; replace damaged parts before next use. Reconnect only when completely dry. For long-term performance, consider using stainless steel jars and blades that resist corrosion and reduce motor strain.
Tough Stains and Odors: Natural Cleaning Solutions
Struggling with baked-on grime or lingering food smells in your mixer grinder? Start by unplugging the unit and disassembling removable parts. Rinse loose debris, then make a paste of baking soda and water (2:1 ratio). Apply paste to stained areas, let sit 10–15 minutes, then scrub gently with a soft brush. For persistent stains, use a cloth dampened with diluted white vinegar (1:1 with water); wipe, wait five minutes, then rinse thoroughly.
To neutralize odors, fill the jar halfway with warm water, add 1–2 tablespoons of baking soda, run the grinder briefly, then rinse well. Alternatively, rub a cut lemon over the jar interiors and blades, wait five minutes, then wash and dry. Always handle blades with care, wearing cut-resistant gloves if available. Dry all parts completely before reassembly to prevent microbial growth. Store the grinder with the jar upside down and lid ajar to keep components fresh and odor-free.
Descaling and Removing Mineral Buildup
For mineral buildup, you’ll use two simple, effective steps: a vinegar soak to dissolve limescale and a baking soda scrub to lift residue. Start by soaking removable metal parts in a 1:1 vinegar-water solution for 15–30 minutes, then rinse thoroughly. Follow with a paste of baking soda and water applied with a soft brush to scrub remaining deposits, then rinse and dry completely.
Vinegar Soak Method
Want a simple way to dissolve mineral deposits inside your mixer grinder? You’ll use white vinegar to descale safely and effectively. Unplug and disassemble removable parts. Mix equal parts white vinegar and warm water; don’t use concentrated acid. Submerge lids, jars, and blades (blade assembly removed) for 20–30 minutes. Rinse thoroughly, then air-dry. For internal stator or heating elements, dampen a cloth with diluted vinegar and wipe—never pour liquid into the motor housing. Reassemble only when all parts are fully dry.
| Item | Action | Time |
|---|---|---|
| Jar | Soak | 20–30 min |
| Blade | Soak/Rinse | 20–30 min |
| Housing edge | Wipe | 2–3 min |
Follow manufacturer warnings and test a small area first.
Baking Soda Scrub
Looking for a straightforward, non‑abrasive way to break down mineral deposits? Mix a paste of baking soda and water (3:1 by volume) until it’s spreadable. Turn off and unplug the grinder, remove detachable parts, and wipe loose debris. Apply the paste to affected metal surfaces and crevices with a soft brush or cloth; avoid electrical contacts and plastic fittings. Let it sit 10–15 minutes to react with limescale, then scrub gently in circular motions. Rinse parts thoroughly with warm water and dry immediately with a clean towel to prevent new deposits or corrosion. For stubborn buildup, repeat once more or combine with a short vinegar rinse, then reassemble only when completely dry.
Drying, Deodorizing, and Storage Best Practices
How will you make sure your grinder stays fresh and functional between uses? After washing, dry all removable parts thoroughly with a clean lint-free cloth, then air-dry on a rack for at least 30 minutes to ensure internal crevices are moisture-free. Wipe the motor housing with a dry microfiber to remove residual dampness; never submerge or spray the motor.
For deodorizing, sprinkle a small amount of baking soda into bowls, let sit 15–20 minutes, then rinse and dry. Alternatively, wipe interiors with a 1:1 vinegar–water solution, rinse, and dry immediately to neutralize odors without leaving residue.
Store the grinder with lids off or ajar to allow airflow and prevent mustiness. Keep all parts disassembled if space allows, nested neatly to avoid scratches. Place silica gel packets or a food-safe desiccant nearby in a ventilated cabinet to absorb humidity. Store in a clean, dry area away from heat sources, strong-smelling foods, and direct sunlight to maintain safety and longevity.
Reassembly Checks and Lubrication Points
Ready to put your grinder back together? Keep parts organized and dry; lay them out in the order you removed them. Inspect seals, gaskets, and O-rings for cracks or deformation—replace any compromised components before assembly. Align the blade assembly and bowl correctly; ensure blades sit flush and spin freely by hand without contacting housing. Reposition the lid and locking mechanisms, confirming they engage securely; never operate the unit with loose locks.
Check the motor shaft for debris, and wipe it with a lint-free cloth. Apply a thin smear of food-grade lubricant to grease points specified by the manufacturer—typically the spline, bearings, or coupling—using only recommended products. Avoid over-lubrication; excess can attract dust or contaminate food. Refit the bowl and blades, then tighten fasteners to specified torque if provided. Before full use, run a brief power test without ingredients to confirm smooth operation, no unusual noises, and that guards and switches function correctly.
Maintenance Schedule and Troubleshooting Tips
Now that the grinder’s reassembled and lubricated, set up a simple maintenance schedule so small issues don’t become big repairs. Weekly: wipe exterior, check cord for damage, tighten visible fasteners, and run briefly with water to clear residue (unplug before inspection). Monthly: remove jars and blades, inspect seals and bearings, clean thoroughly, and re-lubricate moving joints per manufacturer guidance. Quarterly: test motor load for unusual noise or vibration; if present, stop use and inspect coupling and brushes. Annual: replace wear parts—seals, gaskets, and brushes—or have a certified technician service the unit.
Troubleshooting tips: if motor hums but doesn’t run, check coupling and rotor clearance; if overheating, reduce continuous run time and inspect ventilation; if sparking occurs, stop immediately and inspect brushes and commutator with power disconnected. Always unplug before servicing, use proper tools, and consult the manual or a professional for electrical faults to ensure safe, reliable operation.
Frequently Asked Questions
Can I Wash Mixer Grinder Parts in a Dishwasher?
You can usually wash stainless steel jars and detachable lids in a dishwasher, but you shouldn’t put the motor base, rubber seals, or sharp blades exposed to high heat; always check your model’s manual and secure blades in a basket.
Can I Use Bleach to Disinfect Blades or Jars?
Yes — you can, but you shouldn’t regularly. Bleach can disinfect stainless blades and jars if diluted (1 tablespoon per quart), rinsed thoroughly, and air-dried; avoid prolonged exposure to prevent corrosion or damage to seals and coatings.
How Do I Sharpen Dull Blades Safely?
You sharpen dull blades safely by removing them, securing in a vise or clamp, filing or honing along the original bevel with consistent strokes, checking alignment, balancing, then reassembling; wear gloves, eye protection, and test cautiously.
Can I Use Food-Safe Oils on Blade Couplings?
Yes — you can use food-safe oils on blade couplings sparingly. Wipe excess, avoid contact with food surfaces, choose a light NSF H1-rated lubricant, and reassemble securely. Inspect regularly and relubricate per manufacturer recommendations.
How Often Should Seals and Rubber Gaskets Be Replaced?
Replace seals and rubber gaskets every 12–24 months or sooner if you spot cracks, stiffness, leaks, or food buildup; don’t wait—inspect monthly, and swap damaged parts immediately to maintain hygiene and safe operation.