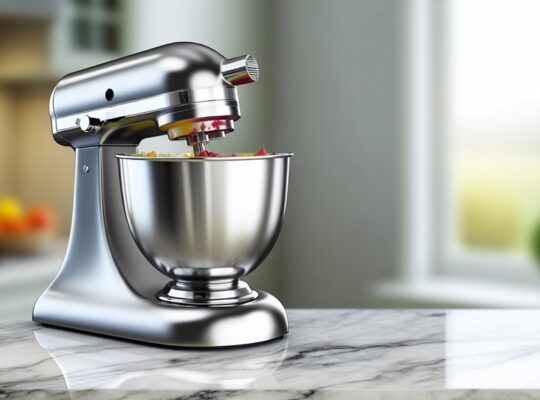
If your mixer grinder jar is slipping or vibrating, you’ll want to replace the coupler precisely and safely. Start by unplugging the unit and removing jars, then inspect the worn coupler for cracks or stripped teeth. Match the replacement to the shaft diameter and keyway, and prepare basic tools like a soft mallet and hex key. The steps are straightforward but require care—keep going to avoid common mistakes and ensure reliable reassembly.
Key Takeaways
- Unplug the unit, remove jars and attachments, wear gloves and safety glasses, and work on a non-conductive, well-lit surface.
- Identify the exact model and coupler type by recording model plate data and photographing the coupler profile.
- Inspect and clean the coupler recess, checking for worn, rounded, chipped, or missing teeth before disassembly.
- Remove retaining clips or set screws, use penetrating oil and a padded gear puller for tight press fits—avoid hammering the motor shaft.
- Match shaft diameter, bore, and keyway to an OEM coupler, press it straight on, secure with specified fasteners/torque, and test rotation without load.
Tools and Materials You’ll Need
What will you need to complete the coupler replacement? You’ll require a small, organized kit: insulated screwdrivers (flat and Phillips), a set of precision Allen keys, needle-nose pliers, and a bench vise or clamp with soft jaws to hold the jar base without damage. Include a torque-limited screwdriver or torque wrench if specified by the manufacturer. Have replacement coupler(s) matched to your model, plus mounting screws and a locking washer set. Use a clean lint-free cloth, isopropyl alcohol (70–90%) for degreasing, and a small brush for debris removal. Keep dielectric grease or food-safe silicone lubricant on hand for mating surfaces only if manufacturer permits. Prepare safety items: insulated gloves, safety glasses, and a dust mask. Use a non-conductive work mat and small parts tray to prevent loss. Verify power is disconnected and work in a well-lit, ventilated area. Follow manufacturer torque and alignment specifications during reassembly. Choose a replacement coupler that matches the original’s motor power rating to ensure proper fit and performance.
Identifying Your Mixer Grinder Model and Coupler Type
First locate the model number plate—usually on the base or underside—so you can reference exact specs. Examine the coupler’s profile (star, spline, hex, or square) and note dimensions or number of lobes to classify its shape. Check for compatibility markings or part numbers on the coupler or in the manual to confirm a correct replacement. Also ensure the unit has proper ventilation and is cool before servicing to avoid heat-related damage.
Model Number Location
Where’s the model number on your mixer grinder and why does it matter: it’s the key to identifying the correct jar coupler type. You’ll locate and record it before ordering parts or disassembling anything to keep work safe and accurate.
Common model number locations to check:
- Base underside: flip unit with power unplugged and read stamped or printed plate.
- Rear panel: near power cord entry or ventilation slots.
- Inside lid or jar recess: some manufacturers print model info where the jar sits.
- Owner’s manual or original box: safest source if you still have it.
Photograph the number and note manufacturer codes. Match characters exactly; small differences change coupler compatibility. Always unplug the appliance before inspecting labels or removing covers. Many silent mixer grinders, such as the Silent Power Sunmeet models, print model data on the base for easy identification.
Coupler Shape Types
How do you tell which coupler shape your mixer grinder uses? Inspect the motor spindle and the jar base with the appliance unplugged and jars removed. Note geometric features: flat-sided hexagonal, square, splined/star, D-shaft (flat plus rounded), or round with key. Measure across flats or diameter with calipers to the nearest millimeter. Count splines or teeth on splined types. Check axial depth of engagement and presence of a raised locating boss or recessed cavity. Photograph both parts for reference. Compare shapes only—don’t assume fit by brand alone. Record measurements and observations before ordering or installing a replacement. Follow manufacturer torque and assembly instructions when fitting a new coupler to prevent slippage, wear, or personal injury. For improved longevity, consider couplers with built-in overload protection that align with the appliance’s safety protocols.
Compatibility Markings
Why not start by checking the labels and stamped codes on both the motor housing and jar base? You’ll locate model numbers, part codes, and safety symbols that narrow compatible couplers. Note serial prefixes and molded part IDs; they often map directly to replacement kits. Don’t guess—misfit couplers can shear teeth or cause slips.
- Record the motor model code and date stamp.
- Inspect the jar base for molded part numbers and orientation marks.
- Compare codes with manufacturer datasheets or authorized parts lists.
- Verify drive profile (male/female, spline count) against code references.
Use a magnifier and good light. If codes are missing or worn, measure spline geometry and consult the manufacturer to confirm compatibility before installing a replacement coupler. For added safety and ease, refer to models with clear visible lid-lock indicators and stable bases when testing replacement fitment.
Safety Precautions Before You Begin
Before you start, shut off and unplug the mixer grinder and remove any jars or attachments to prevent accidental startup and knife contact. Verify power is disconnected by checking the switch position and visually confirming the cord is unplugged. Work in a well-lit, ventilated area clear of liquids and clutter. Wear cut-resistant gloves and safety glasses; don’t use loose clothing or jewelry that could snag moving parts. Keep a standard insulated screwdriver set and non-conductive pliers within reach; inspect tools for damage before use. Place the unit on a stable, level surface with non-slip padding to prevent shifting. Have a small container ready for screws and fasteners to avoid loss and contamination. If the grinder recently operated, allow at least 30 minutes to cool; metal components retain heat and can burn. If you notice frayed cords, exposed wiring, or unusual odors, stop and consult a qualified technician before proceeding. Proceed only when safety checks are complete. Always ensure the appliance, cord, and outlet are dry and the socket is properly grounded before beginning work to reduce the risk of electrical shock and fire grounded outlet.
Preparing the Appliance for Disassembly
Ready to work? You’ll prepare the mixer grinder systematically to reduce risk and make disassembly efficient. Start by ensuring power isolation and a clear workspace; don’t skip steps.
- Disconnect power: unplug from the wall and switch off any nearby isolators.
- Empty and clean: remove jars and wipe base to prevent slippage and contamination.
- Stabilize unit: place on a flat, non-slip surface and secure with a towel or clamp if needed.
- Gather tools: insulated screwdriver set, pliers, soft cloth, and a small container for fasteners.
Verify absence of residual charge by waiting a few minutes after unplugging. Remove any detachable accessories (rubber feet, lid seals) that could be in the way of screws or panels; store them labeled. Inspect external screws and fasteners so you know what to remove first. Keep work area well-lit and avoid jewelry or loose clothing. With these steps complete, the appliance will be safe, accessible, and orderly for the disassembly phase that follows. Many modern mixers include surgical-grade blades that should be handled with care during disassembly.
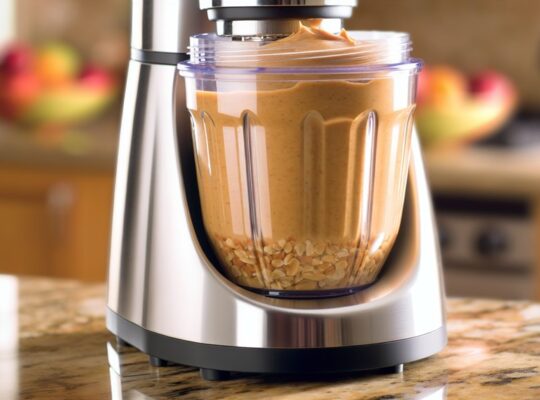
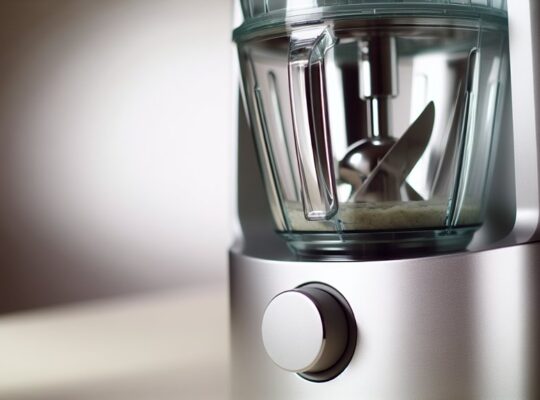
Removing the Jar and Inspecting the Coupler
With the unit unplugged and jar cooled, lift the jar straight up and off the base using both hands to avoid tipping. Inspect the coupler for wear, cracks, or stripped teeth, rotating it to view all surfaces. Check for trapped food or grit in the coupler recess and clean it out before proceeding. Also wipe the coupler and surrounding recess with a cloth to remove moisture and debris, and check the seals and gaskets for damage.
Remove Jar Safely
Once the grinder is unplugged and stationary, lift the jar straight up while holding the base to prevent torque on the coupler. You’ll avoid strain and unexpected rotation; keep fingers clear of the coupling teeth. If the jar resists, stop and verify the locking mechanism or latch is fully disengaged before applying more force.
- Grip jar at its center of mass, not the lid, to maintain balance.
- Use slow, vertical movement; don’t rock or twist the jar.
- Place jar on a stable, padded surface to prevent chipping or slipping.
- Keep tools and debris away from the coupler area while jar is removed.
After removal, don’t touch internal components with bare hands; wear gloves if needed and proceed to inspection steps. Inspect the coupler and surrounding gaskets for wear or damage to help prevent leaks and ensure a secure seal.
Examine Coupler Condition
How will you know if the coupler needs replacing? You’ll inspect it immediately after removing the jar. With power unplugged and jar removed, visually and physically check the coupler for wear, cracks, rounded teeth, wobble, corrosion, and material loss. Use a flashlight and gloved hands. Do not force the coupler; note any play or irregular rotation.
| Inspection Item | What to look for |
|---|---|
| Teeth profile | Rounded, chipped, or missing |
| Rotation fit | Smooth vs. wobbly/play |
| Cracks | Hairline to full fractures |
| Corrosion | Pitting or flaking metal |
| Material loss | Thinning or deformation |
If any defect is present, plan replacement. Document findings and select correct OEM or compatible part. Maintain safety: unplug, wear gloves, avoid touching sharp edges. A sturdier motor and thicker jar construction can exacerbate coupler wear over time, so inspect more frequently for users of brands with denser ABS housings.
Check for Debris
Before you remove the jar, unplug the unit and make sure the base is stable; then lift the jar straight up to expose the coupler so you can inspect and clear debris. You’ll work methodically: examine the coupler recess, shaft, and surrounding seals for trapped particles that can block engagement or cause wear. Use tools and PPE as needed, avoid forcing parts, and keep fluids away from the motor.
- Use a flashlight and magnifier to reveal small fragments.
- Remove visible debris with a soft brush or plastic pick; avoid metal tools.
- Wipe surfaces with a lint-free cloth dampened with isopropyl alcohol.
- Check for embedded food, hardened residue, and foreign objects in the coupler spline.
Reassemble only when dry and debris-free.
Detaching the Old Coupler From the Motor Shaft
Wondering how to free the old coupler from the motor shaft? Begin by ensuring the appliance is unplugged and the jar is removed. Wear safety gloves and eye protection. Inspect the coupling area for set screws, retaining clips or rubber sleeves; these must be removed first. If you see a set screw, use the correctly sized hex or flat driver and loosen it counterclockwise while stabilizing the shaft with a soft-jawed plier. For retaining clips, use snap-ring pliers to expand and withdraw the ring; keep tension controlled to avoid injury. If the coupler is a tight press fit, apply penetrating lubricant around the junction and let it sit per product instructions. Use a gear puller with padded jaws, aligning it squarely to the shaft, and apply steady, even force until the coupler releases. Avoid hammering directly on the shaft; if light taps are needed, use a soft-faced mallet and protect the shaft with a block. Clean mating surfaces after removal.
Choosing the Correct Replacement Coupler
Now you’ll choose a replacement coupler that matches your mixer’s model specifications to guarantee fit and function. Measure the motor shaft diameter and length precisely and verify the coupler bore and keyway dimensions match. Whenever possible use an OEM part or a certified equivalent to maintain torque rating and material compatibility.
Match Model Specifications
Which coupler fits your grinder? You’ll match model specifications to ensure compatibility, performance, and safety. Start by confirming the exact model number on the base and the jar; don’t guess.
- Verify manufacturer and model code from the appliance label.
- Cross-reference part numbers in the manual or official parts list.
- Confirm material and torque ratings specified for the coupler.
- Check any firmware or generation notes that affect mechanical parts.
Use OEM or manufacturer-approved equivalents; generic parts can fail under load. When specs differ, prioritize torque rating and part number over appearance. Keep documentation (photos, labels) during removal so you can confirm matches. If in doubt, contact the manufacturer or an authorized service center before installing a replacement.
Check Shaft Dimensions
Often you’ll need precise shaft measurements to choose a replacement coupler that fits and transmits torque reliably. Start by removing power and securing the grinder. Measure shaft diameter with calipers at multiple points; note any taper or wear. Record shaft length from bearing shoulder to end, and the distance between key features (shoulder, keyway start, threaded section). Inspect and measure keyway width and depth; tolerances matter for torque transfer. Check for splines: count teeth and measure pitch and major/minor diameters. Note concentricity and runout—excessive runout indicates worn parts that a new coupler won’t fix. Compare all dimensions to the replacement specification sheet. If dimensions differ beyond tolerance, don’t install the part; reassess component condition for safety.
Prefer OEM or Equivalent
Having verified shaft dimensions and tolerances, choose a replacement coupler that matches the original equipment manufacturer (OEM) specification or a certified equivalent to guarantee fit, material properties, and torque capacity are correct. You’ll reduce failure risk by prioritizing matched metallurgy, shore hardness, and approved torque ratings. If OEM parts aren’t available, select equivalents with traceable certification and documented performance data.
- Confirm material grade and hardness match OEM.
- Verify torque rating meets or exceeds original specification.
- Require batch certification or supplier traceability.
- Inspect dimensional drawings or sample parts before installation.
You’ll avoid unsafe mismatches by insisting on certified parts and retaining documentation for maintenance records. When in doubt, consult the appliance manual or authorized service center to confirm compatibility.
Installing the New Coupler Step by Step
Ready to install the new coupler? Position the motor unit on a stable, level surface and ensure power is disconnected. Wear safety gloves and eye protection. Verify the replacement matches the original in diameter, spline count, and material.
Inspect the shaft and housing for burrs or debris; clean with a lint-free cloth and light solvent if necessary. Apply a thin film of manufacturer-recommended lubricant to the shaft only; avoid excess that could migrate. Align the coupler’s keyway or spline with the motor shaft; you’ll feel a slight resistance when correct. Press the coupler straight onto the shaft using steady hand pressure; don’t rock or twist aggressively.
If the fit is tight, use a soft-faced mallet and a wooden dowel against the coupler’s face to tap it fully home, keeping strikes centered. Confirm the coupler sits flush against the shoulder with no gap. Secure any retaining screw or circlip to specified torque. Verify there’s free rotation without wobble before proceeding.
Reassembling the Jar and Motor Unit
Now that the coupler’s seated and secured, you’ll reattach the jar to the motor unit in a controlled sequence to ensure alignment and safe operation. Position the jar over the coupler so the drive lugs align; don’t force it. Lower straight down until you feel the coupling engage, then twist gently to the locked position specified by your model. Confirm seals, fasteners, and splash guards are correctly seated before use.
- Check the jar base for cracks or debris that could prevent a flush fit.
- Align locating tabs on the jar and motor housing; a misalignment risks wear.
- Tighten any external locking rings or clamps to manufacturer torque recommendations.
- Reinstall lids, safety interlocks, and any removable guards; never operate without them.
Visually inspect the assembly for gaps, loose parts, or displaced gaskets. Keep hands clear of the coupling while testing; only proceed to powered testing after a final safety check.
Testing Performance and Troubleshooting Common Issues
How will you verify the replacement worked and spot problems quickly? Begin with a dry-run test: ensure the grinder is unplugged, mount the jar with the new coupler, then plug in and run at low speed for 10–15 seconds while standing clear. Check for secure engagement, abnormal vibrations, noise, or wobble. Increase to medium speed; observe coupling alignment and heat at the motor base for 30–60 seconds. Stop and inspect for loosened fasteners or misalignment.
If you hear grinding, slipping, or notice burning smell, immediately power off and unplug. Tighten screws, realign the coupler, and recheck for cracks or debris on mating surfaces. If vibration persists, inspect bearings and shaft runout; replace damaged parts. If electrical faults occur (trips, no-start), consult the service manual or a qualified technician—do not bypass safety interlocks. Document tests and outcomes; only return the unit to regular use after all issues are resolved and safe operation is confirmed.
Frequently Asked Questions
Will Replacement Couplers Fit Jars From Other Brands?
Sometimes — but you shouldn’t assume fit. Measure shaft diameter, spline count and profile, and mounting depth; confirm material strength and clearance. If any spec mismatches exist, don’t force parts; use compatible OEM or certified replacements.
Can a Coupler Be Repaired Instead of Replaced?
Yes — you can sometimes repair a coupler if damage is minor. Inspect for cracks, stripped splines, or looseness; replace worn plastic, tighten fasteners, or bond small cracks with high-strength epoxy, but prioritize safety and replacement when doubt exists.
Do Coupler Materials Affect Food Safety?
Yes — coupler materials affect food safety: you’ll want food-grade, BPA-free plastics or stainless steel to avoid contamination, degradation, odor transfer, and bacterial harboring; inspect for wear, replace if cracked, and clean regularly.
Where Can I Recycle Old Couplers and Jars?
You can recycle old couplers and jars at municipal metal/plastic drop-off centers, appliance recycling programs, or certified e-waste facilities; contact local waste authorities for accepted materials, sanitize parts, and separate metals, plastics, and rubber for proper processing.
Is Professional Installation Ever Necessary?
Sometimes yes: if the motor shaft, coupling mount, or internal gearbox’s alignment is damaged, you shouldn’t DIY. You’ll need a trained technician with proper tools, torque specs, and safety checks to prevent further damage or injury.