You’ll want to keep your mixer grinder clean to protect its motor, seals and your food. Start by unplugging and taking apart jars, blades and lids, then use warm soapy water, a soft brush for crevices and careful drying before reassembly. Inspect gaskets and blades for wear and lightly lubricate metal spindles if needed. Follow a simple daily routine plus a deeper monthly check to avoid leaks and costly repairs—here’s how to do that step by step.
Key Takeaways
- Unplug the mixer grinder and allow parts to cool before removing jars, blades, lids, and gaskets for cleaning.
- Handle blades by the base with cut-resistant gloves, detach carefully, and soak briefly in warm, soapy water.
- Scrub jars, lids, and grooves with a soft brush or cloth; use cotton swabs for tight crevices and rinse thoroughly.
- Deodorize persistent smells with baking soda paste, diluted vinegar soak, or lemon-and-salt rub, then rinse and dry.
- Air-dry all components completely, inspect gaskets for damage, reassemble correctly, and test the unit briefly without load.
Why Regular Cleaning Matters for Your Mixer Grinder
Why should you clean your mixer grinder regularly? You’ll reduce health risks by removing food residues that harbor bacteria, mold, and odors. Regular cleaning prevents cross-contamination between ingredients, especially when you switch from raw meat or spices to fruits or dairy. You’ll also extend the appliance’s life: accumulated grime strains motor and blades, causing overheating and wear. Consistent maintenance keeps performance reliable — blades stay sharp, jars rotate smoothly, and seals remain intact — so you won’t face unexpected failures mid-prep. Cleaning reduces fire and electrical hazards by preventing residue build-up around vents and contacts that can impede cooling or spark. It also preserves flavor integrity; old odors won’t transfer to fresh recipes. Finally, routine care saves money and time: fewer repairs, better efficiency, and quicker prep overall. Make cleaning a brief, regular habit to keep your mixer grinder safe, sanitary, and functioning at peak performance. Always inspect and replace worn gaskets and seals to prevent leaks and maintain safe operation.
Safety First: Unplugging and Preparing the Appliance
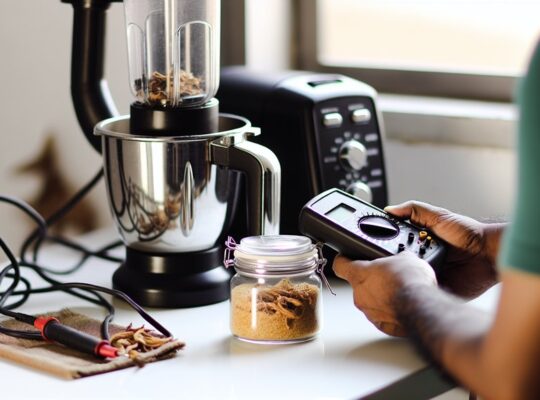
Before you start cleaning, unplug the mixer grinder to eliminate any risk of accidental startup. Take off all jars, blades, and lids so you can clean each part safely and access the base more easily. Handle blades carefully and set small attachments aside where they won’t get knocked over. Always remove gaskets and check them for wear (replace gaskets) before reassembling to ensure a proper seal and prevent leaks.
Unplug Before Cleaning
Ready to clean? Always unplug the mixer grinder first to eliminate any chance of accidental starts or electric shock. Treat the power cord and socket with care: don’t yank the plug, and check for damage before you touch the unit. Wait a few minutes after unplugging to let any moving parts stop fully and to cool hot components.
- Confirm the plug is fully removed from the outlet and keep children away.
- Inspect the cord and plug for frays or exposed wires; if damaged, don’t use it.
- Allow internal capacitors to discharge by leaving the appliance unplugged for several minutes.
- Work in a dry area; wipe up spills before you handle the grinder’s body or base.
Unplugging first keeps you safe and prevents equipment damage. Also consider models with overload protection and interlocking lids to improve safety and prevent motor damage.
Remove Attachments First
Now that the grinder is unplugged and cooled, remove all jars, lids, blades, and other attachments before you start cleaning. You should handle blades by the base, not the edge, and place small parts on a towel to avoid slips. Inspect seals and filters for trapped food, and separate dishwasher-safe items.
| Item | Action |
|---|---|
| Jar | Rinse, soak if needed |
| Blade | Handle carefully, scrub base |
| Lid | Clean grooves, dry |
| Seal/Filter | Inspect, brush out debris |
Lay items out to dry and keep screws or small pieces in a container so nothing gets lost. If parts are damaged, replace them before next use. Doing this keeps you safe and prevents water or food from reaching electrical components. A useful feature to note is the models often include double locking safety systems to prevent accidental operation.
Disassembling Jars, Blades and Seals Correctly
Start by removing each jar from the base using a gentle twist and lift so you don’t force the mount or scratch the finish. Take the blades out carefully, holding the base with a cloth to protect your fingers, and check seals for cracks or food buildup. Keep blades and seals separate while cleaning so you can inspect and dry them thoroughly before reassembling. Regularly inspect and replace dull or chipped blades to maintain optimal performance and prevent damage, and always check seals for wear to prevent leaks and ensure safe operation (inspect blades).
Proper Jar Removal
Wondering how to take the jar apart without nicking the blades or losing the rubber seal? You’ll work safely and efficiently if you follow a steady routine: unplug the grinder, let hot contents cool, and hold the jar base with a towel to prevent slips. Turn the jar upside down, stabilize the blade assembly with one hand, and twist the base counterclockwise—don’t pry. Lift components straight up to avoid stretching the seal.
- Inspect the jar rim and threads for food debris before reassembly.
- Keep small parts on a clean tray so they don’t roll away.
- If a part resists, stop and recheck for hidden screws or clips.
- Always dry parts fully to prevent mold or rust.
- Also, always wear cut-resistant gloves when handling the blade assembly to protect your hands.
Blade and Seal Care
Carefully disassembling the blades and seals keeps your grinder safe and leak-free: unplug the unit, let all parts cool, and work over a towel to catch small pieces. Start by removing the jar from the base, then hold the jar firmly and twist the blade assembly counterclockwise (or follow manufacturer directions). Use a thick cloth or gloves to protect your hands; blades are sharp. Lift out the rubber seal and inspect it for cracks, hardening, or food buildup. Clean blades and seals separately with a soft brush and mild detergent, rinse thoroughly, and dry completely to prevent corrosion and mold. Replace any damaged seals immediately. Reassemble in reverse order, ensuring the seal seats evenly and the blade assembly locks securely before you use the grinder. Choose a grinder with a 500W motor when replacing or upgrading to ensure effective and reliable performance.
Cleaning Blades and Hard-to-Reach Crevices
How do you get stubborn food particles out of the blades and tiny crevices without risking cuts or damage? You’ll work deliberately: unplug the unit, remove the jar and blade assembly, and let any hot residue cool. Use tools that keep your fingers away from sharp edges and reach narrow gaps.
- Use a soft-bristled brush or toothbrush to dislodge debris around the blade base and seals.
- Apply a cotton swab or pipe cleaner dipped in mild detergent to clean tight crevices and corners.
- For stuck particles, soak the blade assembly in warm, soapy water briefly, then scrub gently with a brush while holding the hub, not the blade edge.
- Rinse thoroughly, shake off excess water, and dry with a lint-free cloth or air-dry upside down to prevent corrosion.
Inspect blades for nicks and reassemble only when completely dry. Handle blades with a towel or protective glove to avoid cuts and keep the motor base dry at all times. Also check that the jar and blades are stainless steel and the seals are intact to ensure durability and hygiene.
Washing Jars, Lids and Rubber Gaskets Safely
Want to prevent odors, staining, and gasket damage when washing your mixer jars and lids? Start by unplugging the unit and removing jars, lids, and rubber gaskets. Rinse solids away immediately to avoid staining. Use warm water with mild dish soap; scrub jars and lids with a non-abrasive sponge to protect polished or coated surfaces. Remove gaskets gently—don’t stretch or twist them—so you can clean grooves and seating areas. Soak gaskets in warm soapy water for a few minutes if greasy, then wipe with a soft cloth; avoid boiling unless manufacturer permits it. Inspect gaskets for cracks or deformation and replace if compromised. Rinse all parts thoroughly to remove soap residue, which can affect food flavor. Dry jars, lids, and gaskets completely with a clean towel or air-dry upside down on a rack to prevent mold. Reassemble only when every component is fully dry, and store lids slightly ajar to maintain ventilation. Also, keep your purchase documents and register the appliance to ensure warranty coverage is valid and easy to claim.
Deodorizing and Removing Stubborn Odors
Struggling with lingering smells in your mixer jars and lids? You can remove odors safely with a few reliable steps that avoid harsh chemicals and protect seals. After washing, try one of these simple deodorizing methods, then air-dry fully before reassembling.
- Baking soda paste: make a 1:1 paste with water, scrub inside jars and lids, rinse thoroughly.
- White vinegar soak: dilute 1 part vinegar to 3 parts water, soak 10–15 minutes, then rinse well.
- Lemon rub: cut a lemon, rub surfaces or squeeze juice with a little salt, leave 5–10 minutes, then rinse.
- Activated charcoal or coffee grounds: place a small cloth pouch in the jar overnight to absorb smells.
For stubborn odors, repeat the chosen method or combine vinegar soak then baking soda scrub. Always rinse thoroughly and let parts air-dry completely to prevent mold and protect rubber gaskets. Also, before cleaning, always unplug the unit and ensure the base and work area are dry to reduce the risk of electrical shock.
Cleaning the Motor Base and Control Panel
Before you start wiping the motor base and control panel, unplug the grinder and, if possible, remove any detachable parts so you don’t introduce moisture into electrical components. Use a soft, dry brush or compressed air to remove loose dust and food particles from vents and around switches. Dampen a microfiber cloth lightly with a 50/50 solution of water and mild dish soap; wring it well so it’s just barely damp. Wipe the exterior, avoiding direct contact with openings, seals and the power socket. For sticky spots, apply the damp cloth, let it sit a few seconds, then wipe gently—don’t scrub hard. Clean control knobs and buttons carefully, using a cotton swab dampened minimally to reach crevices. If there’s grease, a drop of isopropyl alcohol on a cloth will help, used sparingly. After cleaning, inspect vents and the base for residual moisture before moving on. Keep liquids away from electrical contacts to prevent damage and shock.
Drying, Reassembling and Lubricating Parts
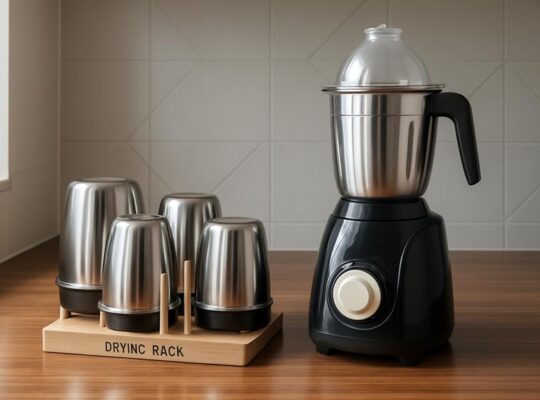
Now that everything’s clean, let everything dry completely—moisture trapped in seals or between parts can cause corrosion or mold. Leave lids, jars, blades, and gaskets on a clean towel or drying rack until no dampness remains. Don’t rush reassembly; a quick check will prevent damage and odors.
- Inspect each gasket and seal for tears or stiffness; replace if compromised.
- Lightly lubricate metal spindle shafts with food-safe lubricant where the manufacturer recommends; avoid oiling electrical or plastic surfaces.
- Refit blades and jars in the correct order, ensuring locking tabs engage and lids snap securely.
- Test the unit without load (brief power-on) to confirm smooth rotation and no strange sounds or leaks.
Work with dry hands and unplugged power during reassembly. Keep manufacturer instructions handy for torque or lubrication specifics. Proper drying and careful reassembly extend life, maintain hygiene, and reduce safety risks.
Daily Quick-Clean Routine for Busy Kitchens
After the thorough drying and careful reassembly you just completed, a short daily quick-clean will keep your mixer grinder running well between deep cleans. Each time you use it, unplug the unit and remove the jar. Rinse the jar and lid immediately with warm water to prevent residue hardening; use a soft brush on blades, avoiding direct hand contact with sharp edges. Wipe the motor base with a damp cloth—never immerse it—and clean around buttons and vents with a dry toothbrush or compressed air to dislodge crumbs. Check the rubber gasket and rim for trapped food and rinse or wipe them clean. Dry parts thoroughly before reattaching to prevent moisture entering the motor. Store jars upside down to drain any remaining water. If you notice unusual smells or leakage, stop using the grinder and inspect seals or electrical connections. These daily steps take minutes and reduce buildup while keeping the appliance safe and ready.
Deep-Clean and Maintenance Schedule for Longevity
Consistency is what keeps a mixer grinder working reliably, so set a simple deep-clean and maintenance schedule you can actually follow: perform a thorough deep-clean every 1–2 months (more often if you use it daily or grind oily/spicy foods), inspect seals, blades, and the motor housing for wear every 3–6 months, and replace rubber gaskets or worn parts as soon as you spot cracks, deformation, or persistent leaks. When deep-cleaning, unplug the unit, disassemble jars, lids, and blades, soak removable parts in warm soapy water, then scrub, rinse, and dry completely. Wipe the motor base with a damp cloth and a soft brush to remove trapped debris; never immerse the base. Keep a maintenance log to note cleaning dates, replaced parts, and any unusual noises or overheating. Regular lubrication of coupling points (if recommended by the manufacturer) and prompt replacement of dull blades will preserve performance and safety.
- Check seals and gaskets for cracks
- Replace blades showing nicks or dullness
- Clean vents and cooling fans
- Record service and part replacements
Frequently Asked Questions
Can I Put Mixer Grinder Parts in the Dishwasher?
Generally, you shouldn’t; many grinder jars, blades, and rubber seals can warp or dull in dishwashers. Check your manual; if dishwasher-safe, place items on top rack and use mild cycle. Handwash when unsure for safety.
How Often Should I Replace Blades and Gaskets?
You should replace blender and grinder blades every 1–2 years or sooner if nicked/dull, and replace rubber gaskets every 6–12 months or when cracked, warped, leaking, or hardened to maintain safe, effective performance.
Can I Use Bleach or Harsh Chemicals for Cleaning?
No — you shouldn’t use bleach or harsh chemicals on your mixer grinder; they can corrode metal, damage seals, and leave toxic residues. Stick to mild dish soap, baking soda for stains, and thorough rinsing and drying.
Is It Safe to Grind Ice or Frozen Items?
You shouldn’t grind ice or large frozen items unless your grinder specifically says it’s rated for ice; doing so can damage blades, motor, and seals. Use crushed ice or thawed pieces to protect the appliance and guarantee safety.
Can Pests or Mold Grow Inside Unused Jars?
Yes — if jars stay damp or stored with food residue, mold and pests can develop. You should dry and air jars thoroughly, store with lids off or sealed clean, and check regularly to prevent contamination.