You’re likely hearing noise from a mixer grinder when parts are loose, blades are misaligned, or the motor is strained from overload. Cracked gaskets, worn bearings, or debris can amplify vibration and tone. Properly assess blade fit, securing fasteners, and signposts of wear, then consider overload and duty cycle. Regular cleaning and maintenance help, but a persistent clang or grind suggests a deeper issue you’ll want to pinpoint before proceeding further.
Key Takeaways
- Loose or worn components (blades, blade nut, drive coupling, or mounting) can create rattling, grinding, or banging noises.
- Overloading the mixer grinder increases motor load and vibration, causing higher-pitched or louder operation.
- Motor, capacitors, or loose electrical connections can produce humming, buzzing, or intermittent noise.
- Imbalanced or damaged blades, gaskets, or misaligned assembly raise load and cause unusual sounds.
- Dirt, residue, or worn seals can cause friction, sealing leaks, and additional noise; regular cleaning helps prevent this.
Common Causes of Noise in Mixer Grinders
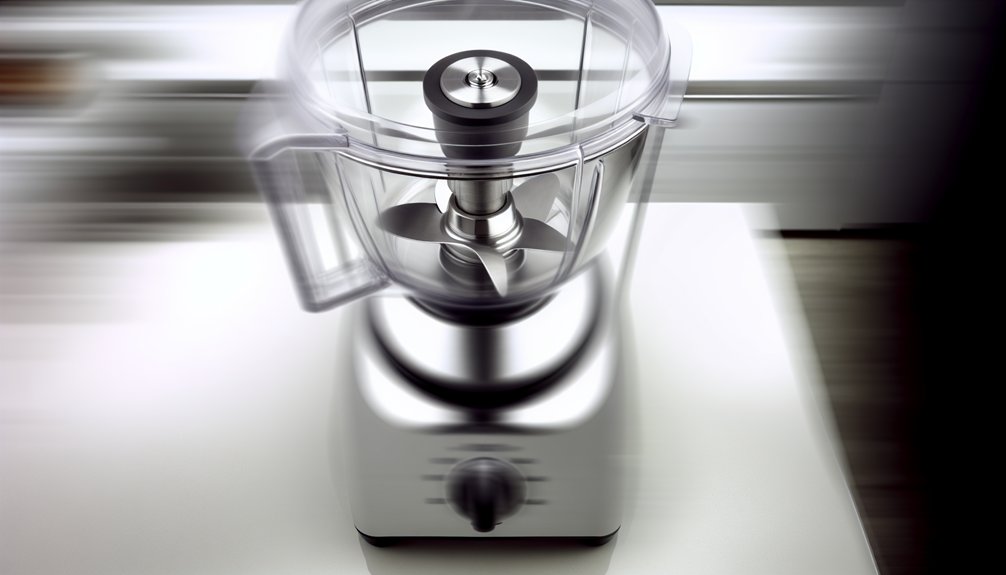
Common noise in mixer grinders commonly stems from mechanical and electrical sources that affect operation. You’ll first verify mounting stability, as loose feet or chafed brackets translate to vibration and audible tones. Next, inspect grinding blades for imbalance, nicks, or improper seating, since uneven blades shift load and generate grinding or whirring sounds. Power transfer components—drive shaft, couplings, and bearings—may exhibit wear or misalignment, producing clatter or rumble. On the electrical side, motor windings or capacitors can introduce humming, whining, or subtle buzzing, particularly under load or at startup. Ascertain proper pulley alignment and belt tension to prevent slipping or belt squeal. Finally, confirm that accessories are compatible and correctly installed to avoid resonance or abnormal mechanical interaction with the housing. Safety first: disconnect power before inspections. Drive shaft and other power transfer components should be checked for wear or misalignment to prevent noise caused by mechanical play.
Diagnosing Loose or Worn Components
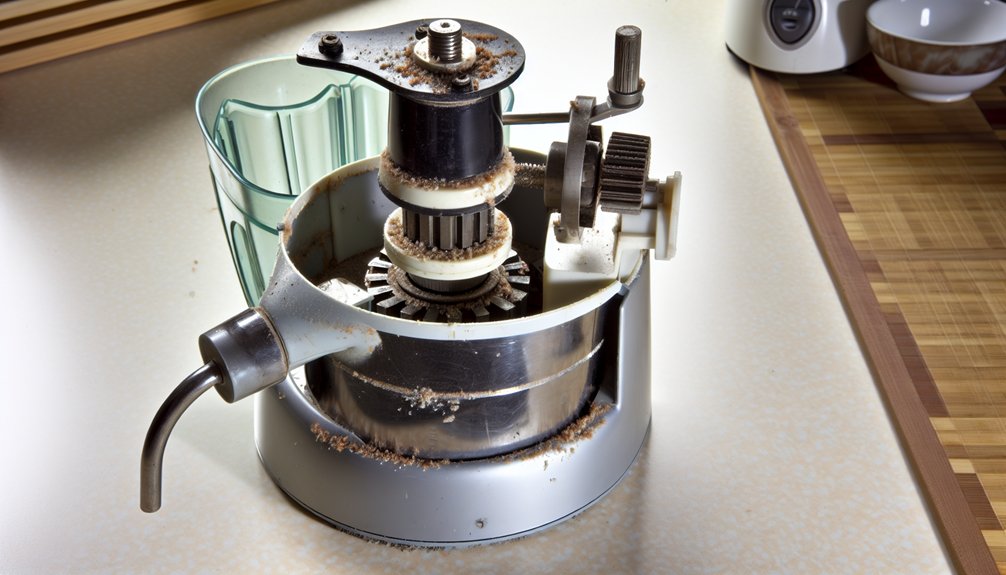
Diagnosing loose or worn components begins with a systematic, component-by-component check. You should power off and unplug before inspection to prevent accidental starts. Begin with the lid, jar, and seal; twisted or cracked gaskets can loosen seals and transmit vibration. Next, evaluate the blades for play, chips, or dull edges, which raise load on the motor and create rattle. Check the blade nut and coupling for tightness; a loose fastener can mimic bearing noise. Inspect bearings for roughness, binding, or uneven wear, listening for grinding rather than smooth rotation. Examine the motor mounts and housing for cracks or shifting that amplify looseness. Document findings and correlate with observed noises, then decide if an adjustment, tightening, or part replacement is required. Safety remains your prime concern throughout. Regular maintenance can prevent many issues and extend the life of your mixer grinder, including scheduling timely inspections and keeping spare parts on hand for quick repairs. Maintenance guidance helps you anticipate wear before it becomes a problem.
How Overload Affects Noise Levels
When a mixer grinder is overloaded, the increased mechanical demand raises motor current and torque, which in turn amplifies vibration and noise. You’ll notice a higher pitch and louder operation as the drive train fights to maintain speed. This condition elevates bearing and seal strain, accelerating wear and potential lubrication dispersal. Electrical signatures shift: current draw spikes, and voltage drop can occur if the supply is marginal, compounding audible results. Repeated overloads risk overheating, reducing efficiency and shortening component life. Safely addressing this requires operating within the appliance’s rated load, using appropriate batch sizes, and pausing to cool after extended runs. If abnormal noise persists under normal load, inspect for obstruction, misalignment in the coupling, or residual debris limiting rotor freedom. Seek professional service if uncertainty remains. Overload protection and motor design characteristics from models like the Panasonics, Bajaj, and Sumeet lines emphasize staying within rated capacities to minimize noise and wear motor design.
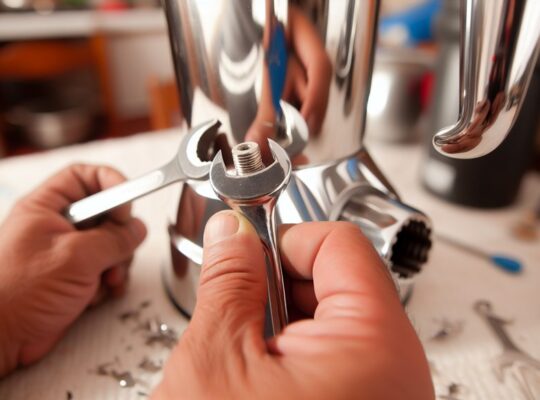
Blade Alignment and Assembly Checks
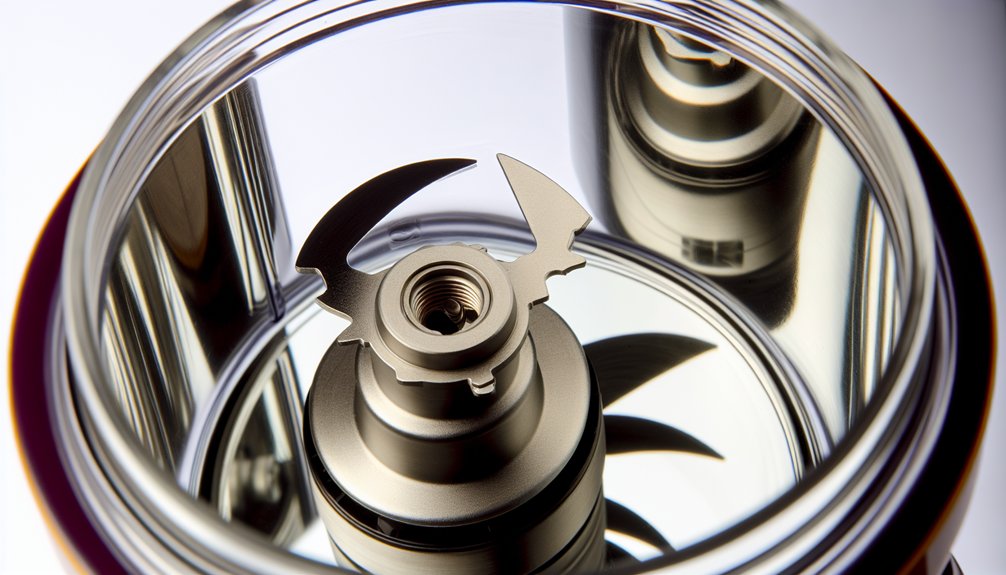
Blade alignment and assembly checks require precise verification of blade height, orientation, and secure fastening. You should power off, unplug the unit, and inspect the blade stack for uniform gaps and straight, centered alignment. Check that blades sit flush with the housing surface and that the blade mounting hole aligns with the drive stem groove to prevent wobble. Verify you’re using the correct blade set for your model, and confirm all spacers, washers, and locking nuts are present and undamaged. Tighten fasteners in a cross pattern to specification without over-torquing, then recheck blade runout with the appliance resting on a stable surface. Run the motor briefly at no-load to confirm smooth operation and listen for abnormal contact sounds. Safety priority: discontinue use if misalignment is detected. Regular maintenance checks can help sustain peak performance and reduce noise over time, especially after replacing blades or jars. blade alignment
Quick Fixes and Preventive Maintenance
To keep mixer grinders operating smoothly and extend their life, perform quick fixes and preventive maintenance on a regular schedule.
- Inspect lid gasket and seals for wear; replace if cracking or hardened to prevent leaks and debris ingress.
- Clean blades and housing with a damp cloth after use, guaranteeing no residue remains that could imbalance future runs.
- Verify cord insulation and plug integrity; replace damaged components to reduce shock and fire risk.
- Lubricate or service bearings only as manufacturer-recommended, avoiding over-lubrication that can attract dust and clog mechanisms.
- Regularly check mounting screws and interlock switches to guarantee secure operation and safe shutdown. Maintain clean electrical contacts and store units in a dry, dust-free environment to preserve performance. Overload protection and safety locks help prevent operation without secure jar placement and contribute to long-term reliability.
Frequently Asked Questions
Is Grinding Noise Normal During First-Time Use?
Yes, short, unfamiliar grinding noises can occur during first-use due to initial component seating; if persistent, stop, unplug, inspect for loose parts, and contact support. Ascertain load is appropriate, blades free, and motor isn’t overheating. Safety first.
Can Changes in Noise Indicate Motor Overheating?
Yes, changes in noise can indicate motor overheating; you should immediately stop, unplug, and let it cool. Check ventilation, load size, and bearing wear, then consult the manual or a technician to prevent electrical hazards and component damage.
Do Noise Patterns Differ Between Wet and Dry Grinding?
Yes. Wet grinding tends to produce steadier, hum-like noises, while dry grinding often yields sharper, grinding or rattling tones; monitor for abnormal changes, as irregular patterns may indicate wear, imbalance, or motor strain requiring immediate safety checks.
Should I Worry if Noise Stops After a Pulse Crack?
Yes, you should worry: if noise stops after a pulse crack, it could indicate a loose part or mounting, bearing damage, or electrical fault. Stop usage, inspect securely, and consult repairs before resuming operation. Safety first.
How Does Blade Material Affect Long-Term Noise Levels?
Blade material influences long-term noise by damping vibrations and resisting wear; harder alloys may transmit higher-frequency vibrations if imbalanced, while softer blades wear unevenly, increasing blade-out-of-balance risk. Regular inspection and balanced operation keep noise lower and safer.