If your mixer grinder isn’t grinding smoothly, start by checking the basics: are jars correctly seated, blades sharp, and ingredients cut uniformly to 1–2 cm pieces? You’ll want to confirm seals, couplings, and speed settings too, since worn parts or poor loading often cause coarse output or motor strain. There are simple fixes and tests you can run yourself — keep going for targeted checks and step-by-step solutions.
Key Takeaways
- Don’t overfill: load jars to about two-thirds capacity and cut solids into 1–2 cm pieces for consistent blade contact.
- Use correct jar/blade: choose dry-grind jar and coarse blade for spices, multipurpose jar and S-blade for wet purees.
- Maintain moisture balance: add 20–30% liquid for wet grinding to promote circulation and prevent clumping or cavitation.
- Run short pulses (10–15 s) with 30–60 s rests, redistributing contents if vibration or stalling occurs.
- Check blades, coupling, and motor: sharpen/replace dull blades, replace cracked coupling, and ensure stable voltage and no motor overheating.
Common Causes of Coarse Grinding
Why is your mixer grinder leaving large particles instead of a fine powder? You’ll first check for improperly dosed load: overfilling reduces blade contact and airflow, so you’ll process smaller batches. Next, examine ingredient moisture—wet or oily items clump, resisting comminution; dry and pre-dry materials to specified moisture limits. Motor underperformance is common: low voltage, worn brushes, or thermal protection cycling cut torque, so you’ll confirm stable power and prevent overload. Jar selection matters—use the correct jar and speed range for dry grinding to maintain optimal tip speed. Improper feed technique can produce coarse output; pulse rather than continuous feeding for controlled shear. Foreign debris or large unprocessed chunks cause rebound and inconsistent particle size; you’ll sieve inputs and remove contaminants. Finally, cooling gaps and ventilation affect performance—avoid prolonged runs that heat components and soften materials, risking safety and reduced grind quality. Before attempting blade work, always unplug the appliance and prepare a safe workspace.
Inspecting and Sharpening Blades
How sharp are the blades in your mixer grinder, and could dull edges be the real cause of poor particle size? You should inspect blades visually and by touch only when the unit is unplugged and the jar removed. Look for nicks, rounded edges, corrosion, and uneven wear. Use a magnifier and good light. If edges look blunt, you can sharpen lightweight stainless blades carefully with a fine sharpening stone or diamond file; secure the blade in a vise with padded jaws and maintain the original bevel angle. Deburr with a fine file and clean thoroughly before reassembly. Test on a small batch and listen for improved cutting action; stop immediately if vibration increases. Consider choosing or replacing blades made of stainless steel for durability and corrosion resistance.
Checking and Replacing the Coupling
Before blaming blades, check the coupling—the small rubber or plastic hub that links the motor shaft to the jar spindle—because a worn or cracked coupling will let the motor spin without transferring torque, causing poor grinding, slipping, or a rattling noise. First, unplug the unit and remove the jar. Inspect the coupling for cracks, deformation, missing teeth or hardened material; rotate it by hand to feel play or slippage. If the coupling is degraded, obtain the correct replacement part specified by the manufacturer—do not substitute generic sizes. To replace, remove retaining screws or clip, pull the old coupling straight off the motor shaft and jar spindle, and press the new coupling fully onto both shafts ensuring a snug fit and correct orientation. Reassemble, run a short test with a small load, and listen for firm engagement without grinding or chatter. If vibration, overheating, or continued slipping persists, stop and consult a qualified service technician to avoid motor damage or safety hazards. Also consider checking the motor and build materials, since models with stainless steel components often show greater long-term durability.
Proper Jar Loading and Ingredient Prep
Want consistent, smooth results? You’ll get them by loading jars and prepping ingredients correctly. Improper fill levels, large chunks, or wet-dry imbalance strains blades and risks splatter. Follow these clear, safety-focused steps.
- Fill jars to 2/3 capacity so blades have space; overfilling causes poor circulation and motor strain.
- Cut solids into uniform 1–2 cm pieces; large pieces force repeated cycles and increase heat.
- Layer wet ingredients near blades and dry items on top when needed; this prevents clumping and ensures even shear.
- Use short pulse bursts with 10–15 second runs and 30–60 second rests to control temperature and prevent vapor or motor overload.
Always secure the lid and check seals before starting. Use the correct jar for the task (wet vs dry). If you hear unusual noise or smell burning, stop immediately and inspect. Proper prep extends component life and keeps operation safe. Consider using a model with overload protection to reduce the risk of motor damage.
Motor Health and Power Supply Issues
Check the motor for unusual noises like grinding, whining, or rattling—those often signal bearing wear or loose components. Monitor for overheating or thermal cutouts during heavy loads, which can indicate worn windings or an overloaded duty cycle. Also confirm your supply voltage is stable, since inconsistent voltage can reduce torque and cause intermittent performance. Ensure the appliance has proper overload protection to prevent motor damage and unsafe operation.
Unusual Motor Noises
If your mixer grinder starts making grinding, whining, or buzzing sounds you haven’t heard before, don’t ignore them—these noises usually point to motor wear, bearing failure, or irregular power supply rather than blade dullness. You should switch off and unplug immediately, then inspect external mounts, the rotor shaft for play, and the power cord and plug for damage. Don’t attempt internal repairs without tools and isolation; capacitors and wiring can be hazardous.
- Fear: persistent grinding often signals metal-on-metal wear — stop using it to avoid sudden failure.
- Concern: whining can mean bearing degradation — it’ll worsen if not serviced.
- Alarm: buzzing may indicate voltage fluctuation or a stressed motor winding.
- Relief: early diagnosis prevents costly replacement and reduces safety risk.
Regularly check and clear the ventilation vents to prevent heat buildup that can worsen motor and bearing damage.
Overheating and Cutouts
Why is your mixer grinder cutting out or getting hot so fast? Check for overload: large batches, tough ingredients, or a jammed jar force the motor to draw excessive current, raising winding temperature and tripping thermal cutouts. Stop, unplug, and clear obstructions before restarting. Inspect ventilation: clogged air passages or accumulated dust reduce cooling efficiency; clean vents with a brush and compressed air while powered off. Verify brushes and bearings: worn carbon brushes or seized bearings increase friction and heat—replace parts per manufacturer specs. Ensure proper assembly and correct jar seating; misalignment creates load spikes. If overheating persists despite these checks, don’t continue using it—consult a qualified technician to test motor insulation resistance and the thermal protector to avoid fire or permanent motor damage. Also perform pre-use inspections of jars, lids, blades, cords, and the base to ensure there are no cracks, frayed wires, or an unstable setup that could contribute to overheating and cutouts, especially if the appliance is used on a wet or uneven surface inspect components.
Inconsistent Voltage Supply
Feeling the motor sputter or hear it labored when you run the grinder? You might be facing inconsistent voltage supply. Low or fluctuating voltage stresses the motor, raises current draw, causes heating, and shortens life. Don’t ignore flicker, dimming lights, or intermittent speed loss.
- Check inlet voltage with a multimeter; note drops under load.
- Use a stabilizer or voltage regulator rated for the grinder’s wattage to prevent undervoltage and surges.
- Inspect wiring, plugs, and sockets for loose connections or corrosion; tighten or replace to avoid arcing and hazards.
- If supply issues persist, consult a qualified electrician to assess supply capacity and install protective devices.
Prioritize safety: disconnect power before inspections and avoid DIY mains repairs. For commercial kitchens, it’s also wise to ensure your installer verifies motor-rated wattage and duty-cycle compatibility with your supply to avoid repeated failures.
Cleaning and Maintenance Best Practices
How often should you clean your mixer grinder to keep blades sharp and performance consistent? Clean jars and blades after every use to prevent residue buildup that dulls edges and strains the motor. Weekly, disassemble seals, collars, and the blade assembly for a deeper clean; inspect O-rings for cracks and replace if brittle. Every month, remove the jar coupling and wipe the gear teeth and motor spindle with a lint-free cloth; apply a tiny dab of food-grade lubricant to metal interfaces if manufacturer allows. Always unplug before servicing and avoid immersing the motor base in water. Use a soft brush and mild detergent for blades, rinse immediately, and dry thoroughly to prevent corrosion. Tighten fasteners to specified torque if accessible; loose parts cause vibration and wear. Keep ventilation slots clear of dust with compressed air at low pressure. Log maintenance dates and observations—this helps spot gradual decline and prevents sudden failures, preserving safety and consistent grind quality. A 750-watt motor often found in top models provides the power needed for consistent grinding performance, so regular maintenance helps protect this motor power.
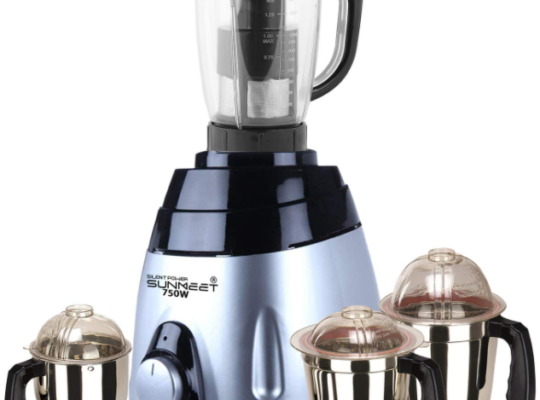
Choosing the Right Jar and Blade for the Task
Picking the right jar and blade combination matters because each material and blade geometry is optimized for specific tasks—use a stainless-steel multipurpose jar with an S-shaped blade for wet grinding and purees, a taller blender jar with a fixed blade for liquids and smoothies, and a shorter, thicker-walled chutney or dry-grind jar with a flat, coarse-toothed blade for spices and dry masalas. You’ll protect motor life and get consistent particle size when you match load, jar volume, and blade type. Inspect blades for dullness, chips, and secure mounting; replace damaged blades immediately. Choose jars with tight-fitting lids and secure locking to avoid spills and pressure buildup. Use the right speed setting for each jar to reduce strain and heat. Follow manufacturer capacity marks to prevent overload. Sanitize stainless interiors after oil-rich tasks to prevent residues. Store blades bundled and covered to avoid accidental cuts. Always unplug before swapping jars or cleaning to maintain safety. Consider models with overload protection and multiple jars to extend motor life and versatility.
Troubleshooting Overheating and Burning Smells
If you smell burning or notice the motor stalling, stop the grinder immediately and check for motor overload indicators like tripped thermal cutouts or a warm-to-the-touch base. A persistent burnt odor usually means insulation or bearings are overheating, oil seals are failing, or the drive coupling is slipping under excessive load. You’ll need to inspect electrical connections, clear clogged vents, and test the motor under light load before using it again.
Motor Overload Indicators
Noticing a burning smell or your grinder shutting off suddenly usually means the motor’s overloaded or overheating — and you’ll want to act fast. Check these indicators so you can shut the unit down safely and prevent damage.
- Rapid shutdowns: repeated thermal cutouts mean the motor’s drawing excessive current; stop use and let it cool.
- Reduced torque: if blades bog under normal load, the motor windings or gearbox may be strained.
- Excessive vibration or noise: imbalance or bearing failure raises motor load and heat generation.
- Warm housing near vents: touch cautiously; persistent hot spots indicate compromised ventilation or internal friction.
If you see any sign, unplug immediately, wait for cool, then inspect or consult a technician.
Burnt Smell Causes
A faint or strong burnt smell from your mixer grinder usually signals overheating or electrical stress and you’ll want to pinpoint the source quickly to avoid damage or fire risk. Start by switching off and unplugging; don’t run it. Check these likely causes and immediate actions:
| Cause | Action |
|---|---|
| Motor overheating | Allow cool-down; reduce load; check ventilation |
| Worn brushes/coil insulation | Stop use; inspect motor; seek repair |
| Bearing/fan seizure | Listen for friction; lubricate or replace |
Smell may come from spilt oil/food on heating elements—clean thoroughly. If smell persists after cooling and cleaning, don’t attempt more fixes; contact a qualified technician. Regular maintenance, correct loading, and good ventilation prevent recurrence and keep operation safe.
When to Seek Professional Repair or Replacement Parts
When should you call a pro or buy replacement parts? If your grinder shows persistent noise, vibration, burning smell, or won’t start after simple checks, it’s time to escalate. Don’t risk electrical hazards or motor damage by guessing.
- Motor failure or intermittent power cuts that persist after testing the cord and switch — get a certified technician to inspect and repair or replace the motor.
- Overheating with smoke or melted components — stop using it and arrange professional repair or genuine replacement parts to avoid fire risk.
- Broken gears, stripped couplings, or damaged blades affecting performance — replace parts with manufacturer-approved components or have a technician fit them.
- Control circuitry faults, sparking, or exposed wiring — only a qualified electrician should service these to ensure safe insulation and grounding.
Document symptoms, model number, and warranty status before contacting service to speed safe, correct resolution.
Preventive Tips to Keep Your Mixer Grinding Smooth
To keep grinding smooth, you should schedule regular blade sharpening, load jars to their recommended capacity, and clean the motor housing and vents periodically. Sharpened blades maintain shear efficiency, correct loading prevents motor overload and uneven wear, and removing dust and residues preserves cooling and bearing life. Follow these practical steps and you’ll reduce strain, noise, and the need for repairs.
Regular Blade Sharpening
Curious why your grinder’s performance drops even with regular use? Regular blade sharpening maintains cutting efficiency, reduces motor strain, and prevents overheating. You’ll feel the difference in chopping speed and consistency. Handle blades with care; always unplug before inspecting or sharpening.
- Inspect: check for nicks, burrs, and uneven edges; small defects reduce shear efficiency and increase torque load.
- Sharpen: use a fine-file or bench grinder at low speed; maintain the original bevel angle to preserve balance and cut geometry.
- Balance: remove equal material from both sides; imbalance causes vibration, fast wear, and safety hazards.
- Reassemble & test: ensure secure mounting, spin freely without wobble, run briefly with water to confirm reduced noise and heat.
Proper Jar Loading
How should you load the jar so the grinder keeps running smooth and efficient? Load ingredients in balanced, layered amounts: heavier, coarse items (roots, nuts) at the bottom near blades, softer items (herbs, cooked vegetables) above. Don’t exceed the maximum fill line; overloading strains the motor and reduces cutting efficiency. For dry grinding, use small batches to avoid packing; tap the jar between batches to settle particles. When wet grinding, maintain a 20–30% liquid-to-solid ratio to promote circulation and prevent cavitation. Securely lock the lid and ensure seals and blades are dry and correctly positioned before starting. Start at a low speed, then ramp up to desired RPM to avoid sudden torque spikes. Stop and redistribute contents if vibration or stalling occurs.
Routine Motor Cleaning
Why should you schedule brief motor cleanings every month? You’ll prevent debris buildup, reduce heat, and keep bearings and brushes operating within safe tolerances. Monthly attention lets you catch wear early and avoid sudden failures.
Follow a short, safe procedure: disconnect power, open ventilation slots per manual, and gently remove lint with a soft brush and compressed air bursts (hold fan blades). Inspect brushes, terminals, and wiring for carbon dust or discoloration. Replace worn brushes before sparking increases.
- Feel relieved — clean motor runs cooler and quieter, reducing fire risk.
- Stay confident — monthly checks expose loose connections early.
- Save money — small fixes beat costly motor replacement.
- Be safe — power off, use PPE, and follow the manual.
Frequently Asked Questions
Can a Mixer Grinder Handle Frozen Ingredients Without Thawing?
You shouldn’t; frozen ingredients can damage blades, overload the motor, and cause jams. If you must, pulse small thawed pieces, use short bursts, ensure sharp blades, and follow manufacturer limits and safety precautions to avoid injury or equipment failure.
Is Using Cold-Pressed Oil Necessary for Smoother Grinding?
No — you don’t need cold-pressed oil for smoother grinding; using a small amount of any neutral food-grade oil can help. Ensure oil is safe, add sparingly, and follow manufacturer safety limits to avoid motor strain or contamination.
Do Blade Materials Affect Flavor Transfer Between Uses?
Yes — blade materials can cause flavor transfer; stainless steel resists corrosion and odor absorption, while carbon steel or aluminum may retain residues. You should clean thoroughly, avoid cross-use without deep sanitizing, and inspect for pitting.
Can Overfilling Affect Electrical Mah Draw or Warranty?
Yes — overfilling can raise motor current draw and risk overheating, possibly tripping protection or voiding warranty if misuse is cited. Don’t exceed capacity, follow load guidelines, and let the motor cool between heavy batches.
Are Grinder Noises During Idle Operation Normal?
Yes — slight humming or faint whir during idle’s normal, indicating lubrication and motor readiness, but loud grinding, rattling, or burning smells aren’t. If abnormal noise occurs, unplug, inspect blades, bearings, mounts, and service before further use.