You’ll want a mixer grinder that matches the tasks you do and the budget you’ve set, so start by listing frequency and types of jobs (wet grinding, dry grinding, chutneys, kneading). Compare motor wattage, jar materials, safety features and warranty against price, and prioritize models with good service networks and durable seals. Pick the best balance of power and build for your needs — and then check a few specs before you commit.
Key Takeaways
- Match motor wattage to tasks: ≤500 W for light use, 500–750 W for everyday, and 750–1200+ W for heavy or commercial jobs.
- Balance jar materials and capacities with needs: stainless steel for heavy grinding, BPA-free plastic for light use, sizes 0.5–2 L per task.
- Prioritize safety and protection features—thermal cut-off, overload protector, secure lid locks, replaceable silicone gaskets—even on budget models.
- Compare warranty, service network, and spare-part availability to avoid higher lifetime costs despite lower upfront price.
- Choose control features and duty cycle ratings: variable speed and pulse control for versatility; confirm run-time limits to prevent overheating.
Decide Your Cooking Needs and Frequency
How often will you use the mixer grinder and for what tasks? You’ll first quantify daily, weekly and occasional usage: frequent (daily, multiple meals), moderate (several times weekly) or infrequent (weekend/occasional). Match usage to motor specifications — choose 750–1000 W for heavy-duty, 500–750 W for regular household use, and ≤500 W for light, occasional tasks. List required functions: wet grinding (idli/dosa batter), dry grinding (spices), chutneys, kneading, and juicing; note duty cycles and recommended run times per function to prevent overheating. Evaluate jar materials and capacities against batch sizes; stainless steel for durability, transparent jars for monitoring. Prioritize safety features: overload protection, thermal cut-off, secure lids and non-slip feet. Check maintenance needs—blade assembly accessibility, gasket condition—and warranty coverage for motor and parts. By aligning task frequency and functional specifications, you’ll select a model that’s safe, reliable, and cost-effective without overspending. Consider that a 750W option often offers the best balance of power and efficiency for most families, making it a practical choice for regular use and balanced performance.
Set a Realistic Budget Range
Wondering what you should realistically spend? You’ll want a clear, narrow range that balances durability, safety features, and intended use. Don’t guess — base the range on expected lifespan, warranty length, and availability of certified safety features like thermal overload protection and grounded plugs. Prioritize manufacturers with documented service networks so repairs won’t force replacement.
- Low range: basic safety features, limited warranty, suitable for occasional use and light tasks.
- Mid range: longer warranty, reliable service network, standard safety certifications and better build quality.
- High range: comprehensive warranties, advanced safety systems, stainless components, intended for frequent heavy use.
Set a minimum acceptable spend that guarantees essential safety specs, and a maximum that still offers reasonable return on investment for your cooking frequency. Record model prices, compare exact warranty terms, and exclude any options lacking verified safety certifications. This keeps your decision precise, risk-aware, and aligned with realistic expectations. A practical tip is to consider brands with larger after-sales networks and longer motor warranties, such as wider service network, when estimating long-term value.
Compare Motor Power and Speed Options
You’ll want to match motor wattage to tasks—lower wattage handles simple chutneys while heavy grinding and wet grinding need 500W+ for consistent performance. Check RPM ranges: higher RPMs shorten processing time but may overheat for tough ingredients, so look for models that specify low/medium/high RPMs. Also compare continuous (sustained) power rating versus peak power to ensure the motor can run under load without tripping or burning out. Consider models with overload protection to prevent motor damage during heavy use.
Motor Wattage vs. Tasks
Which tasks you plan to tackle should dictate the motor wattage you choose: light jobs like chutneys and smoothies run well on 300–500 W motors, everyday grinding and small nut or spice work benefit from 500–750 W, while heavy-duty uses — wet grinding batter, kneading, or processing large quantities — need 750–1200 W or more. Choose the lowest wattage that safely handles your regular tasks to save energy and cost; pick higher wattage if you frequently push capacity or need longer duty cycles. Higher wattage gives torque and heat resilience but requires sturdier mounting and ventilation. Check overload protection, duty cycle ratings, and thermal cut-outs for safety. Match jar size and blade type to motor capacity to avoid stalls. Also confirm the mixer’s overload protection and motor warranty coverage before purchase.
RPM Ranges Explained
Because motor wattage doesn’t tell the whole story, you should also check RPM ranges to understand how speed and torque interact for each task. Look for documented idle and load RPMs: higher RPMs (20,000–30,000) suit fine grinding and smooth purees, while mid-range (10,000–20,000) balances chopping and wet grinding. Low RPMs (<10,000) provide greater torque for coarse grinding or crushing ice. Prefer models with variable-speed control and clear RPM markings so you can match speed to ingredient and avoid overheating. Verify manufacturer-tested RPM under load and built-in safety features—thermal cut-off, auto-shutoff, and stabilized housing—to prevent motor stress. Choose based on intended tasks, prioritizing safety-rated RPM specs over marketing claims. Also prioritize 750W+ family models with thermal overload protection and reliable service coverage when buying during festival sales.
Continuous vs. Peak Power
RPM and torque tell you how a grinder behaves under load, but motor power ratings reveal how long it can keep that performance. You should distinguish continuous (rated) power from peak (surge) power: continuous indicates safe, sustained operation; peak shows short boosts that can overheat the motor if abused. Prioritize continuous watts for heavy or frequent tasks; accept modest peak watts for occasional blitzing.
- Continuous power: reliable runtime, thermal limits, choose higher W for grinding tough ingredients.
- Peak power: short bursts, not for prolonged use, watch duty-cycle specifications to avoid damage.
- Speed vs. power: match RPM ranges to continuous wattage to ensure you don’t overload the motor; safety features (thermal cut-off, auto-shut) are essential.
Philips models like the HL7505/00 combine sturdy shells and reliable motors that demonstrate good thermal protection and service support for heavy use, making them a safe choice for frequent grinding with thermal cut-off safeguards.
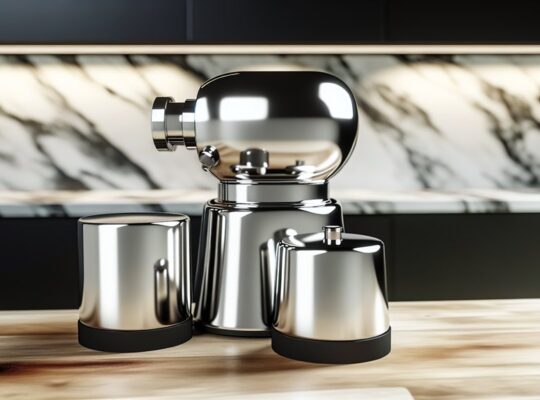
Choose Jar Types and Build Quality
You’ll want to pick jar materials—stainless steel for durability, glass for visibility, or plastic for lightness—based on how often and what you’ll grind. Check capacity options (small chutney to large wet-grind jars) to match batch sizes so you’re not overworking the motor. Inspect lids and seals for tight fits and food-grade gaskets to prevent leaks and maintain pressure while blending. Vidiem models often include multiple jars and SS 304 blades designed for durability and minimal vibration.
Jar Material Choices
Which jar material suits your cooking style and budget? You’ll pick based on durability, safety, and maintenance. Evaluate stainless steel for longevity and impact resistance; it’s hygienic, heat-tolerant, and low-maintenance but opaque, so you can’t monitor contents. Glass offers visibility and is non-reactive—good for acidic foods—but it’s heavier and can shatter if dropped or thermal-shocked. Food-grade plastic is lightweight and inexpensive; choose BPA-free variants and check scratch resistance, but plastic can retain odors and stains with time.
- Stainless steel: durable, heat-resistant, opaque, ideal for heavy-duty grinding.
- Glass: non-reactive, visible contents, fragile—handle carefully to avoid breakage.
- BPA-free plastic: light, budget-friendly, watch for wear, avoid high-heat use.
Sujata’s stainless steel construction often delivers superior durability for heavy-duty use.
Jar Capacity Options
How many jars and what capacities do you really need for your cooking? You’ll want a mix that matches portion sizes and tasks: a 1–1.5L jar for chutneys and wet grinding, a 0.5–0.8L jar for spice and small-batch grinding, and a 1.5–2L jar for wet ingredients or batter. Choose stainless or BPA-free polycarbonate based on prior jar material choices, and check thickness and handle ergonomics for durability and safe handling.
| Task | Typical Capacity |
|---|---|
| Small spices, single-serve | 0.5–0.8 L |
| Chutneys, pastes | 1–1.5 L |
| Batter, large batches | 1.5–2 L |
Prefer jars with reinforced bases and non-slip footing; they reduce vibration and risk during operation. A stainless steel jar is often best for durability and corrosion resistance when you need long-lasting performance.
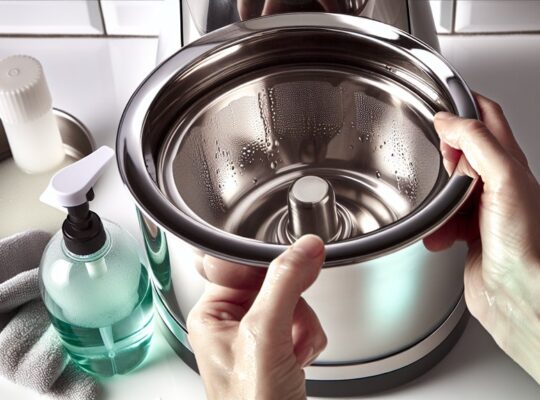
Lid and Seal Quality
Why does lid and seal quality matter? You need reliable lids and seals to prevent spills, contamination, and pressure-related failures during high-speed grinding. Inspect material, fit, and fastenings: food-grade, BPA-free lids with silicone gaskets are best. Check that seals compress evenly and replace easily.
- Tightness: look for leak-proof test results and secure locking mechanisms to prevent splatter and burns.
- Durability: prefer chemical-resistant gaskets and shatter-resistant lids rated for thermal and mechanical stress.
- Maintenance: choose seals that detach for cleaning and have documented replacement part availability.
You’ll prioritize safety and hygiene when buying on a budget: paying slightly more for certified seals reduces risk and long-term costs from leaks or cross-contamination. Also, ensure vents and airflow are unobstructed to help prevent overheating and extend component life during heavy use.
Check Safety Features and Ease of Use
Wondering what safety and usability details you should prioritize? You’ll want clearly specified safety features: an overload protector with reset, thermal cut-off ratings, and double-insulated housings (look for Class II symbol). Check motor cut-out response time and whether the unit locks automatically if the jar isn’t seated; these reduce burn and splash risks. Assess jar lid locks, gasket material (food-grade silicone), and spill-proof venting—confirm part specifications in product literature. For ease of use, confirm jar weight, handle ergonomics, and one-hand lid release dimensions to avoid strain. Controls should be labelled, tactile, and accessible; preferred specs include a speed range with detents and a dedicated pulse function. Look for detachable cords and non-slip base feet with measured suction or rubber pad area to prevent movement. Finally, inspect certification marks (BIS/CE/UL) and clear user manual diagrams so you can operate and maintain the appliance safely and confidently.
Evaluate Warranty, Service Network, and Parts Availability
Want reliable repairs and clear recourse if something fails? You should check warranty terms, service coverage, and spare-part availability before buying. A solid warranty reduces financial risk; confirm length, what’s covered (motor, jars, electrical faults), and whether labor or only parts are included. Verify the service network: how many authorized centers exist in your area, their response times, and whether pick-up/drop-off or on-site repair is offered. Ask about genuine spare parts for blades, couplings, and switches—these are safety-critical components. If parts are scarce or unofficial, repairs can be unsafe.
- Warranty specifics: duration, inclusions/exclusions, and claim process
- Service network: local centers, response time, and on-site options
- Parts availability: genuine replacements for motor, coupling, blades
Use manufacturer websites, user manuals, and seller confirmations to validate claims. Keep documentation and receipts; they’re essential for safe, successful warranty claims and compliant repairs.
Look for Energy Efficiency and Noise Levels
1 key factor you should check is how much power the grinder uses and how loud it runs, because both affect operating cost and kitchen comfort. Look for wattage ratings that match your use: 500–750 W is adequate for light household use; 750–1000 W suits tougher tasks. Lower wattage reduces energy draw but may strain the motor if overloaded. Check rated power versus peak power and duty cycle—continuous rating indicates sustained operation limits.
For noise, compare decibel (dB) figures when provided; <75 dB is acceptable for home use, 75–85 dB is loud and may require hearing caution during prolonged use. Note isolation features: rubber mounts, insulated motor housing, and sealed bearings reduce vibration and noise. Energy-efficient motors (BLDC or improved induction designs) offer better power-to-performance ratios and lower heat buildup, enhancing safety. Prioritize models with clear specifications, energy labels, and manufacturer guidance on duty cycles to prevent overheating and extend service life.
Spot Red Flags and Get the Best Value
Now that you’ve checked power, noise and duty ratings, you should scan for practical warning signs that a grinder won’t give good long-term value. Focus on build details, safety features and clear specifications rather than marketing claims. Check whether seals, jar mounts and switches are metal or flimsy plastic; exposed wiring, vague motor wattage, or no overload protection are deal-breakers. Confirm service network and warranty terms in writing.
- Poorly specified motor type, missing RPM or torque figures
- Short or limited warranty and weak after-sales support
- No thermal cutoff, rubber feet, or lid-lock safety interlock
When assessing models, quantify risk: note maximum continuous run time, manufacturer-specified duty cycle and safety certifications (CE/ISI/BIS). Don’t accept ambiguous labels like “high power” without numeric backing. Prioritize grinders that list clear specs, include safety cutoffs, and have documented repair channels — you’ll reduce replacement costs and safety hazards while getting better long-term value.
Frequently Asked Questions
Can a Mixer Grinder Make Nut Butter or Hummus Smoothly?
Yes — you can make nut butter or hummus, but you’ll need a powerful motor (≥700W), sturdy stainless-steel jar, sharp blades, and pulse function. Watch for overheating, add oil or liquid gradually, and secure lid tightly.
Is There a Timer or Auto-Shutoff Feature Available?
Yes — many models include timers or auto-shutoff; you’ll want a unit with overload protection, thermal cutoff, and programmable timer settings. Verify exact cutoff temperature, response time, and certification marks for safe, reliable operation.
Can I Grind Wet and Dry Ingredients Simultaneously?
No — you shouldn’t grind wet and dry ingredients simultaneously; mixers aren’t designed to separate moisture, risking cross-contamination, motor strain, and uneven results. Use separate jars or batches, guarantee seals and blades match intended use for safety.
Are Spare Jars and Blades Sold Separately?
Yes — manufacturers and retailers often sell spare jars and blades separately; you’ll want OEM replacements for proper fit, blade material and locking specs, and safety certifications, plus clear instructions to ensure correct assembly and safe operation.
Does It Come With a Dedicated Chutney or Idli Attachment?
Usually no — most models include a small chutney jar but not a specific idli attachment; you’ll want to check specs. Confirm jar size, blade type, RPM limits, and safety features like overload protection and locking lids.