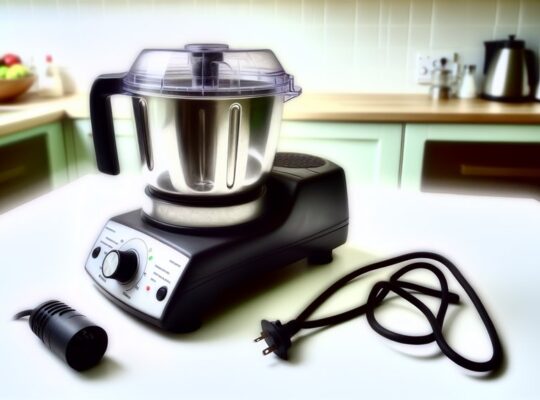
If your mixer grinder isn’t grinding smoothly, start with a quick safety check: unplug it, inspect blade alignment and jar locks, and listen for unusual noises. Small fixes—like dull blades, clogged jars, or overloading—often restore performance, while motor strain or thermal cutouts need careful attention. I’ll walk you through practical checks, cleaning steps, and when to replace parts so you can pinpoint the issue and decide the next step.
Key Takeaways
- Check blade sharpness and replace dull or nicked blades with manufacturer-approved replacements.
- Avoid overloading jars; grind in smaller batches (30–75% capacity depending on wet/dry).
- Ensure correct jar and blade assembly, tight seals, and proper mounting before each run.
- Add a small amount of liquid for pastes and scrape sides periodically to return particles to the blades.
- Clean clogged sieves and blades, remove residue, and inspect motor for overheating or overload trips.
Common Causes of Poor Grinding Performance
Check the basics first: dull blades, overloaded jars, incorrect blade assembly, or a weak motor are the most common reasons your mixer grinder isn’t grinding smoothly. Start by unplugging the unit and visually checking for obvious issues like misaligned blades, loose jar locks, or damaged seals. Listen for unusual noises—grinding, whining, or rattling—that can indicate motor strain or worn gears. Note whether problems happen with wet versus dry grinding; coarse results in wet mixes often mean blade wear or insufficient speed, while dry powders clumping can point to overloading or moisture. Smells of burning or frequent tripping of the circuit breaker signal electrical or motor overload—stop and let the unit cool. Ensure you’re using correct speed settings and recommended fill levels; too little or too much product impairs efficiency. Keep a log of recurring faults so a technician can diagnose persistent motor or bearing failures safely and quickly. Always unplug and prepare the appliance and wear protective gloves and eye protection before inspecting or replacing blades.
How to Inspect and Replace Dull Blades
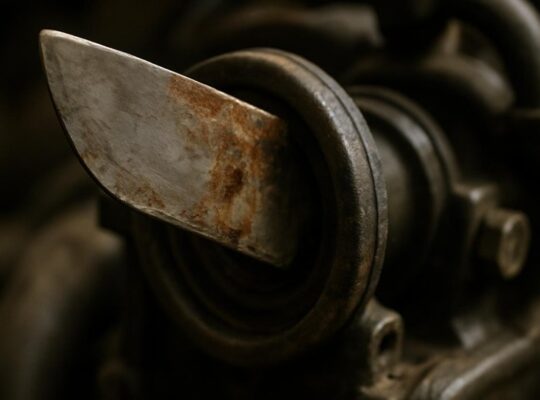
First, inspect the blades visually and by touch for nicks, rounded edges, or uneven wear—sharp edges should bite rather than glide. If the blades look dull or food smears instead of cutting, replace them with manufacturer-approved replacements to restore performance. Always power off and unplug the unit before removing or installing blades. Ensure vents are clear and the motor is not overheating before testing the new blades, as poor ventilation can worsen cutting performance.
Check Blade Sharpness
How do you tell if your grinder’s blades are the problem? Start by unplugging the unit, removing the jar, and visually inspecting blades for nicks, bends, or rounded edges. Gently run a finger (carefully, away from the edge) to feel dullness; no probing wounds. Try a quick paper test: a sharp blade will slice paper; a dull one drags.
| Inspection step | What to look for |
|---|---|
| Visual check | Chips, bends, discoloration |
| Finger feel | Rounded edge, not sharp |
| Paper test | Cuts cleanly vs tearing |
| Performance sign | Longer grind time, coarse output |
| Safety check | Secure mounting, no wobble |
If blades are suspected dull, stop using the grinder to avoid overheating or motor strain and consult the next section for replacement guidance. Overload protection can trigger when blades are dull or obstructed, so check the overload protection if the motor repeatedly stops.
Replace Worn Blades
Blade replacement is a straightforward fix when dullness is confirmed: you’ll remove the jar, free the blade assembly, inspect the mounting and seals, then install a new blade set that matches your model. First, unplug the grinder and empty the jar. Use gloves to avoid cuts, then detach the jar from the base and unscrew the blade unit per the manual. Check for blunt edges, chips, wobble, or corroded mounting surfaces; also examine rubber gaskets and the bearing for wear. If blades are dull or damaged, buy a genuine or compatible replacement with the same fit. Clean mating surfaces, fit the new assembly, replace seals, and tighten evenly. Test briefly with water, listen for vibrations, and stop if anything feels wrong. For long-term value, prefer replacements that maintain the 750W copper motor characteristics and fit your model.
Cleaning and Unclogging Jars and Sieves
If your grinder’s jars or sieves are clogged, they’ll stop material from passing through and ruin the grind — so you’ll want to remove any stuck residue first. Scrape out dried paste or pulp with a soft brush or spatula, then rinse to loosen remaining bits. For sieves, soak in warm soapy water and use a toothbrush or small pick to clear the holes before reassembling. Also consider checking the motor’s wattage to ensure the unit is suitable for your usage and not being overworked.
Remove Stuck Residue
Any dried paste or fibrous bits left in the jar or on the sieve will keep your grinder from achieving a smooth grind, so you should remove that residue before troubleshooting further. First, unplug the unit and detach the jar and sieve to prevent accidental starts. Use a soft brush or silicone spatula to loosen stuck material—avoid metal tools that can scratch surfaces. For stubborn spots, soak the jar in warm soapy water for 10–15 minutes, then scrub gently. Rinse thoroughly and dry completely to stop moisture from causing clogs or corrosion. Check the seal and blade area for trapped fibers and clear them carefully with a brush. Reassemble only when all parts are clean, dry, and securely fitted. Also consider using a stainless steel jar for tougher, fibrous ingredients because it’s more durable and less likely to retain odors or stains.
Deep-Clean Sieves
How thoroughly did you clean the sieve last time? Inspect it for clogged holes, food films, or rust. Unplug the grinder and detach the jar and sieve before you start. Use a soft brush and warm, soapy water to dislodge particles; avoid metal tools that can warp or scratch. For stubborn buildup, soak the sieve in a vinegar-and-water solution (1:3) for 15–20 minutes, then scrub gently. Rinse thoroughly and dry immediately to prevent corrosion and bacterial growth. If holes remain blocked, use a plastic toothpick or a rubber syringe to push debris out—never force with metal. Reassemble only when completely dry and check for proper fit. Regular deep-cleaning prevents clogging and keeps grinding safe and efficient. Also, perform a quick test run with a small amount of liquid to check for leaks before full operation.
Correct Loading and Batch Size Tips
Wondering why your grinder leaves big chunks or overheats? You’re probably loading it wrong. Don’t overfill — follow the jar’s max mark and grind in 50–75% batches for wet mixtures and 30–50% for dry, hard spices. Smaller, consistent batches let blades cut evenly and reduce stress on seals and bearings. Add a bit of liquid for pastes to help movement, and pause to scrape sides so particles return to the blade path. Always secure the lid and keep hands clear.
When you work within recommended batch sizes you cut wear, improve grind uniformity, and lower safety risks. If chunks persist after adjusting loads, check grind settings and blade condition before trying larger batches. A higher-wattage model with greater torque can help finish tough batches faster and reduce motor strain.
Motor Strain, Overheating, and Thermal Cutouts
If you’re still getting chunks or overheating after fixing load sizes, the motor itself may be under strain — and that’s what causes slow grinding, burning smells, or the machine cutting out. Check for blocked ventilation slots and clean dust or trapped particles; restricted airflow raises internal temperature quickly. Listen for unusual noises or a sluggish start—these indicate bearing wear or motor windings under stress. If the grinder trips frequently, allow full cool-down time; thermal cutouts are protecting the motor. Repeated trips mean an underlying issue, not a fix to ignore.
Inspect the power supply and cord for secure connections and correct voltage; undervoltage makes the motor work harder. Smell the motor after a short run; persistent burnt odor suggests insulation damage and needs professional service. Don’t bypass thermal protection or run the unit continuously beyond recommended duty cycles. If you suspect internal electrical faults, unplug and seek qualified repair—safety over quick fixes. Also verify the unit has thermal overload cut-off and other safety features to reduce the risk of repeated motor strain.
Choosing the Right Jar and Blade for the Task
Which jar and blade you pick can make the difference between a silky puree and a lumpy mess. Match jar size to volume: use a small chutney jar for 50–300 ml, a wet grinding jar for 300–1000 ml, and a larger jar for liquids or batter. Don’t overload a jar; leave headspace so blades can move freely. Choose blade type by task: sharp, angled blades cut soft vegetables and fruits cleanly; flat, blunt blades grind dry spices and grains without clogging. For pastes and nut butters use stronger, reinforced blades designed for high torque. Check that blades are securely fitted and undamaged before use — bent or dull blades reduce efficiency and increase risk. Use jars and blades rated for your model; mismatched parts can stress the motor and void warranties. Always unplug before swapping jars or blades, and handle blades with care to avoid cuts. If grinding still underperforms, inspect seals and coupling for wear. Prefer stainless-steel jars and blades for durability and heat resistance to improve longevity and reduce contamination risk, especially in heavy-use situations with overload protection.
Preventive Maintenance and Care Routine
How often should you inspect and clean your mixer grinder to keep it performing smoothly? Inspect weekly for loose parts, worn seals, or unusual noises; clean after every use. Rinse jars and blades immediately, dry thoroughly, and wipe the motor housing with a damp cloth—never immerse the base. Check blade sharpness and alignment monthly; replace or tighten if wobble or dullness appears. Lubricate jar gaskets lightly with food-safe oil every two months to prevent drying and leaks. Ensure vents stay dust-free; use a soft brush or vacuum nozzle to remove buildup, which causes overheating. Always unplug before servicing, and avoid abrasive cleaners that damage seals or coatings. Store jars disassembled to prevent trapped moisture and odors. Keep a simple log of checks and replacements so you spot trends (vibration, smell, reduced grind quality). Routine care prevents failures and keeps operation safe and efficient.
When to Seek Professional Repair or Replacement
Regular checks and routine cleaning will stop many problems, but some issues call for professional help or replacing the unit. If you hear grinding noises that don’t change after cleaning blades and bearings, or if the motor smells burned or trips breakers repeatedly, stop using the grinder and get a technician. Persistent overheating, smoke, sparking at the motor, or burning odor risk fire and electrical shock — these are immediate red flags.
Also consider replacement when repair costs approach or exceed half the price of a new machine, when spare parts aren’t available, or when the safety features (thermal cut-out, lid interlock) fail and can’t be reliably fixed. If the jar, lid, or blade assembly is cracked or warped, don’t attempt DIY fixes that could cause injury.
Choose a qualified service center, verify credentials, request a written estimate, and insist on genuine parts and a post-repair safety check before you resume regular use.
Frequently Asked Questions
Can Using Filtered Water Improve Grinding Smoothness?
Yes — using filtered water can help slightly by reducing mineral buildup on blades and seals, so you’ll get smoother grinding and longer blade life. Don’t overfill; follow safety guidelines and clean parts regularly to avoid risks.
Do Spice Powders Affect Jar Sealing or Performance?
Yes — spice powders can affect sealing and performance. They can clog gaskets, abrade threads, and compromise seals, causing leaks or reduced suction. Clean thoroughly after each use, replace worn gaskets, and avoid overfilling jars.
Can Blade Sharpening Void My Warranty?
Yes, sharpening blades yourself can void the warranty. Manufacturers usually prohibit user alterations; doing so risks damage, safety hazards, and denied claims. Contact the manufacturer or authorized service center to preserve warranty and ensure safe blade work.
Are Noise Changes Linked to Grinding Quality?
Yes — if your grinder gets noisier or sounds different, it can signal dull blades, loose parts, motor strain, or misalignment; you should unplug it, inspect blades and fittings, tighten or replace parts, and avoid unsafe DIY fixes.
Does Altitude Affect Motor Performance?
Yes — altitude can reduce motor cooling and air density, so your mixer grinder may run hotter, lose power, or overheat. Check ventilation, avoid heavy loads, and allow extra cooling time to prevent motor stress or failure.