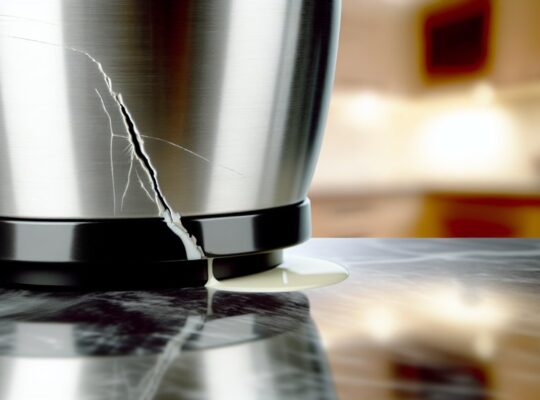
If your mixer grinder smells burnt, don’t ignore it — it’s a warning sign. You could be overloading the motor, jamming the blades, or letting dust and food residues scorch plastic or windings. Faulty bearings, capacitors, or wiring can also cause burning odors. Before you plug it in again, take a few quick safety checks and simple inspections to narrow down the cause so you know whether you can fix it yourself or need a pro.
Key Takeaways
- Overheating from prolonged use or blocked vents can char insulation and produce a hot, acrid burnt smell.
- Jammed blades, overloaded jars, or food trapped in the coupling cause motor strain and scorching odors.
- Worn bearings or carbon brushes create frictional heat and a hot, metallic or electrical burning scent.
- Melted wiring insulation or shorted windings emit a sharp chemical smell and indicate electrical failure.
- Visible soot, melted plastic, persistent smoke, or sparking require immediate unplugging and professional service.
Common Causes of a Burnt Smell in Mixer Grinders
Why does your mixer grinder smell burnt? You’ll first check common culprits so you can diagnose quickly. Overheating from prolonged use is frequent—motors get hot and insulation or dust can char. Jammed blades or overloaded jars force the motor to strain, producing a scorched odor. Food trapped in vents or between blade assembly parts can burn when the unit runs. Worn carbon brushes or failing bearings create friction and a hot, electrical smell. Melted wiring insulation after a short circuit gives a sharp, chemical scent. Faulty capacitors or windings can emit a sweet or acrid burnt odor. Poor ventilation from blocked air inlets raises internal temperature and accelerates burning. Residue from spills on the exterior that contact hot components will also smoke. Note the smell’s character—chemical, paper-like, oily—and match it to these causes to decide whether repair or immediate power-off is needed. Also check for blocked vents and ensure proper airflow to prevent heat buildup.
Safety Steps Before Inspecting Your Appliance
Before you touch anything, unplug the mixer grinder and disconnect it from the power source to prevent shocks. Let the motor cool completely so you don’t burn your hands or damage components. Wear protective gloves when you inspect internal parts or remove the jar to protect against sharp edges and hot surfaces. Also inspect the cord, plug, and surrounding area for frayed wires or moisture before proceeding.
Unplug and Disconnect Power
How do you start a safe inspection? First, unplug the mixer grinder from the wall. Don’t just switch it off—remove the plug. Next, disconnect any attachments and remove jars so you can see the base and cord clearly. Confirm power is off by checking the socket and switch.
| Visual Check | Action |
|---|---|
| Plug in place | Pull plug straight out |
| Power switch | Set to OFF |
| Cord condition | Inspect for cuts |
| Attachments | Remove jars, blades |
| Socket area | Look for scorch marks |
Keep fingers clear of blades and avoid touching internal openings. If the plug or cord is warm or melted, don’t attempt repairs—note the damage and seek a qualified technician. This prevents shocks and further harm. A quick review of your model’s warranty coverage can help determine whether repairs are covered and where to seek authorised service.
Allow Motor to Cool
When did you last turn the grinder off? Wait — don’t rush to open it. Allow the motor to cool fully before touching or inspecting internal parts. A hot motor can cause burns and may still carry stored heat that damages plastic or wiring if disturbed.
Leave the appliance idle for at least 20–30 minutes in a well-ventilated area; longer if you smelled heavy burning or smoke. Check the casing temperature from a safe distance by hovering your hand near (not on) the surface. If it’s still warm, extend the wait. Avoid moving the unit while it’s hot; shifting can dislodge softened parts. Only proceed with inspection when the motor and housing feel room temperature and no residual odor indicates active overheating. Higher-wattage models generally dissipate heat faster, so consider a 750W motor if overheating is a recurring issue.
Wear Protective Gloves
Now that the motor’s cooled and it’s safe to handle, put on a pair of heat-resistant, cut-resistant gloves before you touch any internal parts or wiring. You’ll protect yourself from residual heat, sharp edges, and unexpected electrical contact if a capacitor holds charge. Choose gloves rated for thermal and mechanical protection; inspect for holes, breaks, or degraded material before use. Work deliberately: remove debris with insulated tools, not bare hands. If you spot charred insulation or melted components, stop and unplug; gloves protect you but don’t make repairs safe without expertise. Log what you found and consult a technician if wiring or motor windings look damaged. For routine safety, also check that your appliance has overload protection before returning it to service.
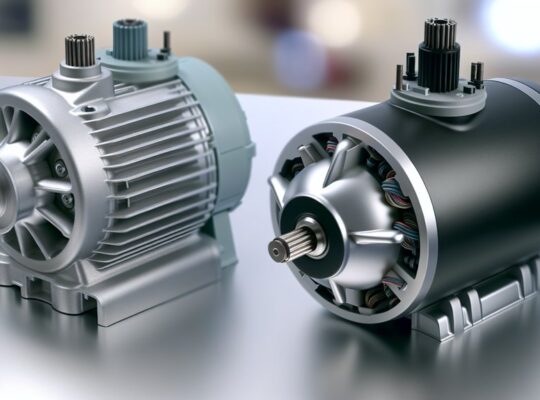
How to Check the Motor and Windings
Start by unplugging the grinder and removing the jar assembly so you can access the motor housing safely. Once exposed, visually inspect the motor vents and casing for soot, melted plastic, or dark discoloration—these indicate overheating. Smell the housing closely (but don’t inhale deeply); a pungent, persistent burnt insulation odor usually points to winding damage.
Next, remove the housing cover per the manual and check the windings for color changes (brown or black streaks), brittleness, or exposed copper. Use a flashlight and magnifier if needed. Don’t touch windings with bare hands; wear gloves. If you have a multimeter, measure winding resistance: compare values to the service specification or check for open circuits. Also perform an insulation resistance (megger) test if available; low insulation suggests shorted turns.
If you find charring, a short, melted insulation, or abnormal resistance, stop and consult a qualified technician—continued use risks fire or further motor destruction. Also consider whether the jars and blades you use are suited to the motor’s capacity—using heavier stainless steel jars can increase motor load and contribute to overheating.
Examining Bearings, Couplings, and Moving Parts
Check the bearings and listen for grinding or rattling—worn bearings often make a distinct noise before they overheat. Inspect the coupling for looseness or side-to-side play, since misalignment can cause friction and burning smells. Address noisy or sloppy parts promptly to prevent further motor damage. Repeated overloads can accelerate wear on bearings and seals and increase the risk of a burning smell.
Worn Bearing Noise
Ever wondered why your mixer grinder makes a grinding or whining noise that gets worse with use? If bearings are worn they’ll cause metal-on-metal sounds, heat, and extra load on the motor. You should stop use immediately if noise is sharp or accompanied by burning smell.
- Listen for steady grinding or high-pitched whine that changes with speed.
- Check for play by gently rocking the jar or shaft—excessive wobble suggests bearing wear.
- Feel for heat around the motor housing; hot bearings can seize and cause smoke or fire risk.
- If you confirm wear, disconnect power and have bearings replaced by a qualified technician; do not attempt risky improvised repairs.
Addressing worn bearings early keeps you safe and prevents costly motor damage. For ongoing protection, verify your model’s overload protection and cooling features are working as described in the manual.
Misaligned Coupling Play
How can you tell if a misaligned coupling is causing play and stress in your mixer grinder? Check for wobble at the jar or shaft, uneven vibrations, and a burning odor during light loads. Don’t run it if you suspect misalignment.
You can safely diagnose initial faults yourself: unplug, remove attachments, look for bent shafts or loose fasteners. If unsure, get professional repair to prevent fire or motor damage. A 750W option is often a good balance for families and small businesses because it handles tougher ingredients without excessive overheating and offers balanced performance.
| Symptom | What it feels like | What to do |
|---|---|---|
| Wobble | Jar rocks, shaft off-center | Power off, inspect coupling |
| Vibration | Shakes more at idle | Tighten mounts, reseat parts |
| Noise | Grinding, clunking | Stop and examine bearings |
| Heat | Motor housing warm quickly | Let cool, avoid use |
| Smell | Acrid or burnt odor | Unplug, service immediately |
Cleaning Food Residue, Oils, and Dust Buildup
Why does your mixer grinder often give off a burnt smell even after you’ve stopped using it? Food residue, cooking oils and household dust can accumulate around seals, vents and motor housing. They carbonize from normal heat, producing a persistent burnt odor that signals contamination rather than immediate mechanical failure.
You should diagnose and address buildup safely and methodically:
- Remove jars, blades and lids; inspect crevices for stuck food and grease.
- Check ventilation slots and motor housing exterior for dust, oil films or darkened residue.
- Use a soft brush and mild detergent on removable parts; wipe housing with a damp cloth and isopropyl wipe for oil traces.
- Let all components dry completely before reassembly; moisture trapped near the motor can cause shorting and smells.
If you detect scorching, smell of electrical burning, or melted plastic, disconnect power and seek professional service. Regular cleaning prevents odor recurrence and reduces fire risk. You should also consider the unit’s wattage and intended usage to avoid overheating during prolonged operation.
Simple DIY Fixes You Can Try at Home
Want to try some quick fixes before calling a repairman? You can often diagnose and fix minor causes of a burnt smell safely. First, unplug the unit and let it cool. Check the jar seals, blades, and lid for trapped food — remove and wash. Inspect the motor vents and wipe away dust. Tighten any loose blade assemblies and ensure jars sit squarely on the base; misalignment causes friction and odor. Test with a small dry run: run the grinder empty for 10–15 seconds and listen for grinding or rubbing noises. If smell diminishes and noise is normal, normal use can resume.
| Symptom | DIY action |
|---|---|
| Residual burnt food odor | Remove parts, soak, scrub seals |
| Loud rubbing or smell on run | Realign jars, tighten blades |
Always unplug before touching internal parts and stop if you see smoke, burning sparks, or hear unusual grinding. If uncertain, pause and consult a technician.
When to Seek Professional Repair or Replace the Unit
When should you stop troubleshooting and call a pro? If the burnt smell persists after simple checks, it’s time to escalate. Don’t risk electrical fire or further motor damage.
- Persistent smell or smoke: If odor continues or you see smoke, unplug immediately and get a technician to inspect wiring and windings.
- Burning smell plus sparking: Visible sparks, burning insulation, or scorched components mean internal arcing—stop using the unit and seek professional repair or replacement.
- Repeated overheating or trips: If the grinder repeatedly overheats, trips breakers, or the thermal cut-out keeps activating, a qualified electric motor repair person should diagnose winding, bearings, or control faults.
- Repair cost vs. replacement: If repair estimates approach or exceed a new unit’s price, or if the motor windings are damaged, replacing the grinder is safer and more cost-effective.
Prioritize safety: unplug, avoid DIY fixes for internal damage, and get a certified technician.
Tips to Prevent Future Overheating and Odors
How can you stop your mixer grinder from overheating and smelling burnt again? Start by using it within rated duty cycles: avoid running more than the recommended minutes, and give the motor cool-down periods. Match jar size and blade type to the task so the motor isn’t overloaded. Cut tough ingredients into smaller pieces and don’t force dense loads; work in batches.
Keep vents and housing clean—unplug first, then clear dust, food debris, and grease that trap heat. Check and tighten jar locks and mounts so the motor isn’t straining on misaligned parts. Use the correct voltage and a grounded outlet; unstable power causes excess heat. Replace worn rubber gaskets, blades, and bearings promptly to prevent friction-related burning.
Listen and smell for early warning signs: unusual noises, sluggish performance, or a faint burning odor. If those appear despite preventive steps, stop use and consult a qualified technician to avoid fire or permanent motor damage.
Frequently Asked Questions
Can a Burnt Smell Indicate Electrical Wiring Issues in My Home?
Yes — a persistent burnt smell can mean wiring issues, especially if you notice scorch marks, flickering lights, tripped breakers, or burning near outlets. Don’t ignore it; shut power, avoid using circuits, and call a licensed electrician immediately.
Could Old Rubber Gaskets Cause a Chemical Odor Mistaken for Burning?
Yes — old rubber gaskets can emit a chemical, plastic-like odor you might mistake for burning. Check seals for cracking or deformation, replace aged gaskets, and ventilate while testing to confirm source and guarantee safe operation.
Does Using Wet Ingredients Cause the Motor to Smell Burned Later?
Yes — if you regularly grind very wet mixtures, water can seep into bearings or motor windings, causing friction, shorting, overheating and a burnt smell; dry, inspect seals, clean thoroughly, and avoid overfilling to stay safe.
Can Smells Transfer From Other Kitchen Appliances to the Grinder?
Yes — smells can transfer from other appliances to your grinder, especially if they share storage, ventilation, or nearby heat sources. Check seals, vents, and cleaning routines; isolate and ventilate appliances to prevent odor transfer and safety risks.
Will Warranty Cover Damage From a Persistent Burnt Smell?
Maybe — it depends. Check your warranty terms: many exclude damage from misuse or overheating. You’ll need proof of defect, service reports, and photos. Contact the manufacturer or authorized service center ASAP for guidance.