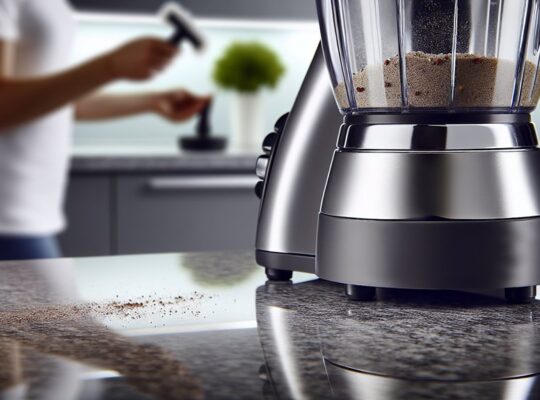
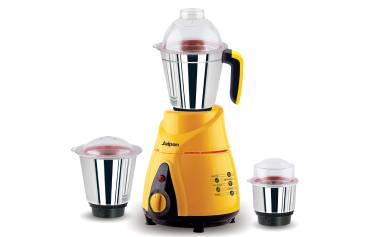
You’ll want to store your mixer grinder so it stays safe, clean, and ready to use. Start by cleaning and drying every part, then separate the motor base from jars and blades. Protect sharp edges, coil the cord loosely, and choose a dry, ventilated spot away from heat and splashes. Follow a few simple organization and inspection steps to avoid damage, electrical hazards, and mold—and keep it working longer.
Key Takeaways
- Store the motor base on a low, stable shelf away from heat, moisture, and the stove to prevent tipping and water damage.
- Remove, wash, and fully dry jars, lids, and gaskets before storing to prevent mold and corrosion.
- Coil cords loosely without tight wrapping and keep the plug accessible for quick disconnect.
- Protect blades and sharp attachments with guards or sleeves and store them upright in a rigid container.
- Group and label jars, lids, and small parts by size, keeping heavy jars low and lids in a padded container.
Why Proper Storage Matters for Your Mixer Grinder
Why does where and how you store your mixer grinder matter? You’ll reduce risks of electrical faults, mechanical damage, and contamination by storing it properly. Keep the appliance in a dry, ventilated spot away from direct heat or moisture to prevent rust, mold, and short circuits. Place it on a stable surface or a low shelf to avoid falls; if space is limited, secure it so it won’t topple when you open cabinets. Protect sharp blades and glass jars with blade guards or by nesting jars separately to prevent chips and accidental cuts. Store cords coiled loosely — not tightly wrapped around the appliance — to avoid insulation wear and internal wire stress. Keep accessories together in a labeled container so you won’t search blindly and risk dropping the unit. Finally, position the grinder where children won’t reach it and where you can easily inspect it before use; that small habit helps prevent accidents and extends the life of your appliance. Also consider storing jars and attachments separately and cleaning gaskets regularly to maintain overload protection and prolong motor life.
Cleaning Steps Before Storing the Appliance
Before storing your mixer grinder, remove the jars and wash them with warm soapy water to remove residues. Rinse well and dry each jar and lid thoroughly—moisture can cause mold or corrosion. Only put completely dry components back in or store them separately to keep the appliance safe and odor-free. Also, perform regular maintenance checks on seals and gaskets to prevent leaks and ensure safe operation by replacing any worn parts seals and gaskets.
Remove and Wash Jars
How do you make sure your mixer grinder’s jars won’t harbor odors or bacteria while in storage? Remove each jar, lid and gasket, then rinse out food particles immediately. Use warm, soapy water and a soft brush to clean corners and blades safely—unplug the base first and handle blades by their non-cut edges.
| Step | Action |
|---|---|
| Remove | Detach jars, lids, gaskets |
| Rinse | Wash away loose debris |
| Clean | Soap, warm water, soft brush |
| Inspect | Check for residue or damage |
Sanitize jars with a mild vinegar solution if you’re concerned about bacteria, then rinse thoroughly. Replace cracked gaskets or containers before storing to prevent leaks and contamination. Store components separately from the motor to keep everything hygienic and ready for safe use. A higher-wattage motor generally offers greater torque which helps when grinding tougher ingredients, so consider wattage when choosing a durable model.
Dry Thoroughly Before Storing
Want to prevent mold, odors, and corrosion? You should dry every part of the mixer grinder completely before storing. After washing jars, lids, blades, and gaskets, shake off excess water, then pat components with a clean, lint-free cloth. Leave parts to air-dry on a rack for at least 30–60 minutes, or until no moisture remains in crevices or around seals. Use a soft brush or compressed air to dislodge trapped droplets near blade mounts. Ensure the motor base is wiped dry and never stored while wet; moisture can damage electrical components and promote rust. Once fully dry, reassemble loosely or store components separately in a dry, ventilated area to maintain safety and prolong appliance life. Regularly inspect gaskets and seals for wear and replace them promptly to prevent leaks and contamination, as part of good storage practice gasket checks.
Thorough Drying to Prevent Rust and Mold
After cleaning, make sure all jars, lids, and the grinder body are completely air-dry before you store them to prevent trapped moisture. Leave parts open on a drying rack or towel until there’s no dampness, paying special attention to seals and crevices. Store the appliance with silica packets or other moisture absorbers to guard against rust and mold. Consider storing removable metal parts separately to further reduce the risk of rust formation and prolong their lifespan.
Ensure Complete Air Drying
Why leave your grinder damp when a little patience can prevent rust and mold? You should disassemble cups, lids, blades, and seals and rinse thoroughly after use. Shake off excess water and wipe accessible surfaces with a clean, lint-free cloth. Then let parts air dry fully on a clean rack in a well-ventilated area; position blades and seals so trapped water drains away. Leave the motor base unplugged and wipe it dry, avoiding soaking electrical components. Don’t reassemble or store any part until every piece is bone dry—check crevices and gasket grooves. Complete drying protects metal parts from corrosion and stops mold growth on rubber seals. If your grinder has a fiber-reinforced or ABS housing, be sure to dry all exterior and interior surfaces thoroughly to preserve the material and finish (build durability).
Store With Moisture Absorbers
How can you keep lingering humidity from undoing all that careful drying? Use moisture absorbers in storage to prevent rust and mold. Place silica gel packets, desiccant pouches, or small activated charcoal containers inside the jar assembly, motor housing cover (if detachable), and the storage box. Replace or recharge absorbers regularly—silica gel often changes color or follow manufacturer timing—to maintain effectiveness. Don’t let absorbers touch electrical contacts; wrap them in breathable cloth or keep them in mesh bags. For long-term storage, add a humidity indicator card so you can check levels without opening the container. Store the grinder in a cool, dry spot away from steam sources. These simple steps reduce corrosion risk and help keep your appliance safe and hygienic for future use. Also, remember that high-torque motors can be damaged by rust and should be inspected before use.
Safely Handling and Storing Blades and Attachments
Where will you put sharp blades so they won’t nick your fingers or cut the storage bin? Treat blades and attachments as tools that need protective barriers and careful placement. Always handle blades by the dull base, not the edges, and wear cut-resistant gloves if you’re unsure. Cover exposed edges with blade guards, thick fabric wraps, or molded plastic sheaths before storing.
- Use dedicated blade sleeves or magnetic strips with covers to keep edges isolated.
- Store blades upright in a rigid container so they don’t slide or contact other items.
- Separate metal attachments with soft liners or individual compartments to prevent nicks and corrosion.
- Label containers clearly and keep blades out of children’s reach and away from high-traffic shelves.
Before storing, dry blades completely and wipe with a light oil to prevent rust. Secure lids and fasten containers so blades won’t shift during handling. Regularly inspect guards and replace damaged covers immediately. Glass jars are non-reactive and allow visual monitoring, so consider storing or transporting sharp attachments in glass jars when transparency is important.
Organizing Jars, Lids and Small Parts
Group jars by size so you can stack them safely and avoid tipping when you reach for one. Keep lids protected in a separate container or wrap to prevent chips and to stop small pieces from getting lost. Label small components and their storage spots so you can find seals, screws, and gaskets quickly during cleaning or reassembly. Consider storing parts with predictive maintenance reminders to catch wear or damage before it causes failure.
Group by Jar Size
Why start by sorting jars by size? You’ll reduce breakage and make safe access easier. Grouping jars prevents unstable stacks, lets you store heavy jars low, and keeps similar seals together so you won’t fumble when reaching for one. Follow a simple, consistent system.
- Place heavy, large jars on lower shelves to minimize tipping risk.
- Store medium jars at waist height for stable lifting and visibility.
- Keep small jars together in a padded bin to avoid rattling and knocks.
- Label zones so you always return jars to their correct spot.
When you arrange by size, you cut handling time and the chance of dropping glass or metal. Maintain clear pathways and don’t overcrowd shelves to preserve a safe kitchen workspace. Consider also including anti-slip feet on storage surfaces to further reduce the risk of slips and accidental jar movement.
Protect Lids Separately
How will you keep lids from getting scratched, warped, or lost? Store lids separately in a shallow, padded container or drawer with dividers so they don’t rub against each other or heavy items. Use soft liners—felt, foam, or clean kitchen towels—to cushion mating surfaces and prevent scratches. Stack same-size lids vertically on edge if space is tight; that reduces pressure that can warp seals. Keep rubber gaskets and small parts in a dedicated, sealed pouch inside the container to avoid contamination and misplacement. Label the container location for quick retrieval, and place it near the jars but not under heavy appliances. Inspect lids before each use for cracks or deformed seals; replace damaged lids to maintain safe, leak-free operation and prevent accidents.
Label Small Components
Where will you look first when you need a replacement gasket or a specific jar? Label small components clearly so you can find and replace parts fast, reducing downtime and risk. Use durable labels or waterproof tags for gaskets, lids, jars and blades. Mark model compatibility and installation date to track wear. Store labeled items in transparent bins or compartmentalized boxes to prevent damage and contamination. Keep hazardous parts like blades sealed and labeled “sharp” for safety. Regularly inspect labels and replace faded ones.
- Use waterproof labels and permanent marker
- Group by function (jar, lid, gasket, blade)
- Note model number and purchase/inspection date
- Store sharp items separately, clearly marked
This reduces errors, prevents misuse, and prolongs equipment life.
Choosing a Safe, Dry Location in Your Kitchen
Looking for the best spot for your mixer grinder? Place it on a low, stable shelf or inside a lower kitchen cabinet where it won’t tip or fall. You’ll want a flat surface that supports the unit’s weight and keeps cords from hanging where someone could trip or pull them. Avoid storing it near the stove, oven, or sink to reduce heat and splash risks; those locations increase electrical hazards and wear.
Choose a location with good ventilation so heat from the motor can dissipate if you leave it for short intervals. Keep the plug accessible so you can disconnect the appliance quickly in an emergency. Make sure the area is well-lit so you can inspect the machine before use. If children are around, store the grinder behind a childproof latch or in a locked cabinet. These measures reduce accident risk and help the appliance last longer without exposing it to unnecessary hazards.
Protecting the Appliance From Dust and Moisture
Once you’ve picked a safe, dry spot, take steps to keep dust and moisture from shortening the grinder’s life. Wipe the exterior and removable parts after each use and let them dry completely before reassembling. Store jars and lids separately upside down so trapped water can escape. Use breathable covers and avoid plastic sheeting that can trap humidity.
- Place a clean, dry cloth or silicone mat under the base to absorb minor spills and prevent scratches.
- Cover the motor housing with a cotton or mesh dust cover to block particles while allowing airflow.
- Keep silica gel packets or a small moisture absorber nearby, replacing them when saturated.
- Store removable blades and attachments in a sealed container to protect metal parts from rust.
Check the appliance weekly for condensation or residue, and dry immediately. These steps reduce corrosion, mold, and motor damage, helping you maintain a safe, reliable mixer grinder.
Electrical Safety and Cord Care
How do you keep your mixer grinder safe from electrical hazards? Unplug it before storing, never rely on a switched socket alone. Coil the cord loosely—avoid tight wraps that stress the internal wires—and secure it with a Velcro tie or cord strap to prevent kinks. Inspect the plug and cord for cuts, exposed wires, or brittle insulation; if you spot damage, don’t use the appliance until a qualified technician replaces the cord or plug.
Store the grinder in a dry place away from damp floors and sinks to reduce risk of short circuits. Keep the appliance and its cord off metal shelves that can abrade insulation. Don’t tuck the cord under heavy items or sharp edges. If you’ll be storing for months, place the cord inside the grinder’s storage compartment or in a small padded bag to prevent accidental tugging. Label the plug end so it’s obvious which appliance it belongs to, avoiding accidental cross-plugging.
Maintenance Checks Before Long-Term Storage
After you’ve checked the cord and unplugged the unit, run through a few maintenance checks before putting the grinder away for months. Clean all jars, lids, and blades thoroughly, then dry them completely to prevent rust and mold. Wipe the motor housing with a damp cloth and ensure ventilation slots are free of dust. Inspect seals and gaskets for cracks or hardening; replace any that look compromised to avoid leaks when you next use the appliance. Lubricate moving parts only if the manufacturer’s manual recommends it.
- Clean and dry every component before storage
- Inspect blades, seals, and fastenings for wear
- Remove trapped food from crevices and ventilation
- Store spare parts and manuals together
Label any replaced parts and note the storage date. Keep the unit in a cool, dry place off the floor, and avoid stacking heavy items on top. These checks reduce hazards and extend the life of your grinder.
Tips for Seasonal and Infrequently Used Units
Why keep seasonal or seldom-used mixer grinders properly stored? You’ll prevent damage, reduce fire and pest risks, and ensure the unit’s safe operation when it’s back in service. First, clean and fully dry every part—jar, blades, lid, and base—to stop corrosion and mold. Remove and store detachable cords separately to avoid nicks; coil loosely and secure with a tie. Apply a light food-safe oil to metal joints to prevent rust, then wrap blades in protective covers. Store accessories in labeled, sealed containers so moisture and pests can’t get in. Place the motor base in a cool, dry spot off the floor, ideally inside a ventilated cupboard or sealed plastic tub with desiccant packs. Check stored units every few months for signs of moisture, pests, or cable degradation, and run a quick safety test before first use. If you notice strange smells, frayed cords, or unusual noises, don’t use the grinder—have it inspected or repaired.
Frequently Asked Questions
Can I Store the Mixer Grinder Upright in a Cupboard With Other Appliances?
Yes — you can store the mixer grinder upright in a cupboard with other appliances, but you should unplug it, secure loose parts and blades, keep weight balanced, avoid stacking heavy items on it, and ensure ventilation and dry conditions for safety.
Can I Use Silica Gel Packs Inside Jars to Absorb Moisture?
Yes — you can use silica gel packs inside jars to absorb moisture; just ensure packs are intact, labeled non-toxic, kept away from children and pets, and replace or recharge them regularly to maintain effectiveness and prevent mold or rust.
Is It Safe to Stack Jars on Top of the Motor Unit?
No — you shouldn’t stack jars on the motor unit; doing so risks scratches, imbalance, accidental startup, or damage to the motor. Always store jars separately on stable shelves, using padding or organizers to prevent tipping and contact.
How Often Should I Run the Grinder During Long-Term Storage?
You should run the grinder every 4–6 weeks for 1–2 minutes to keep bearings lubricated and seals flexible; unplug first, ensure jars are empty, and check for unusual noises or vibrations before and after operation.
Can I Store Metal Blades Near Plastic Containers Without Damage?
Yes — you can, but don’t let metal blades contact plastic directly. Wrap blades in cloth or bubble wrap, use a protective sheath or separate compartment, and store upright to prevent scratches, melting, or chemical transfer.